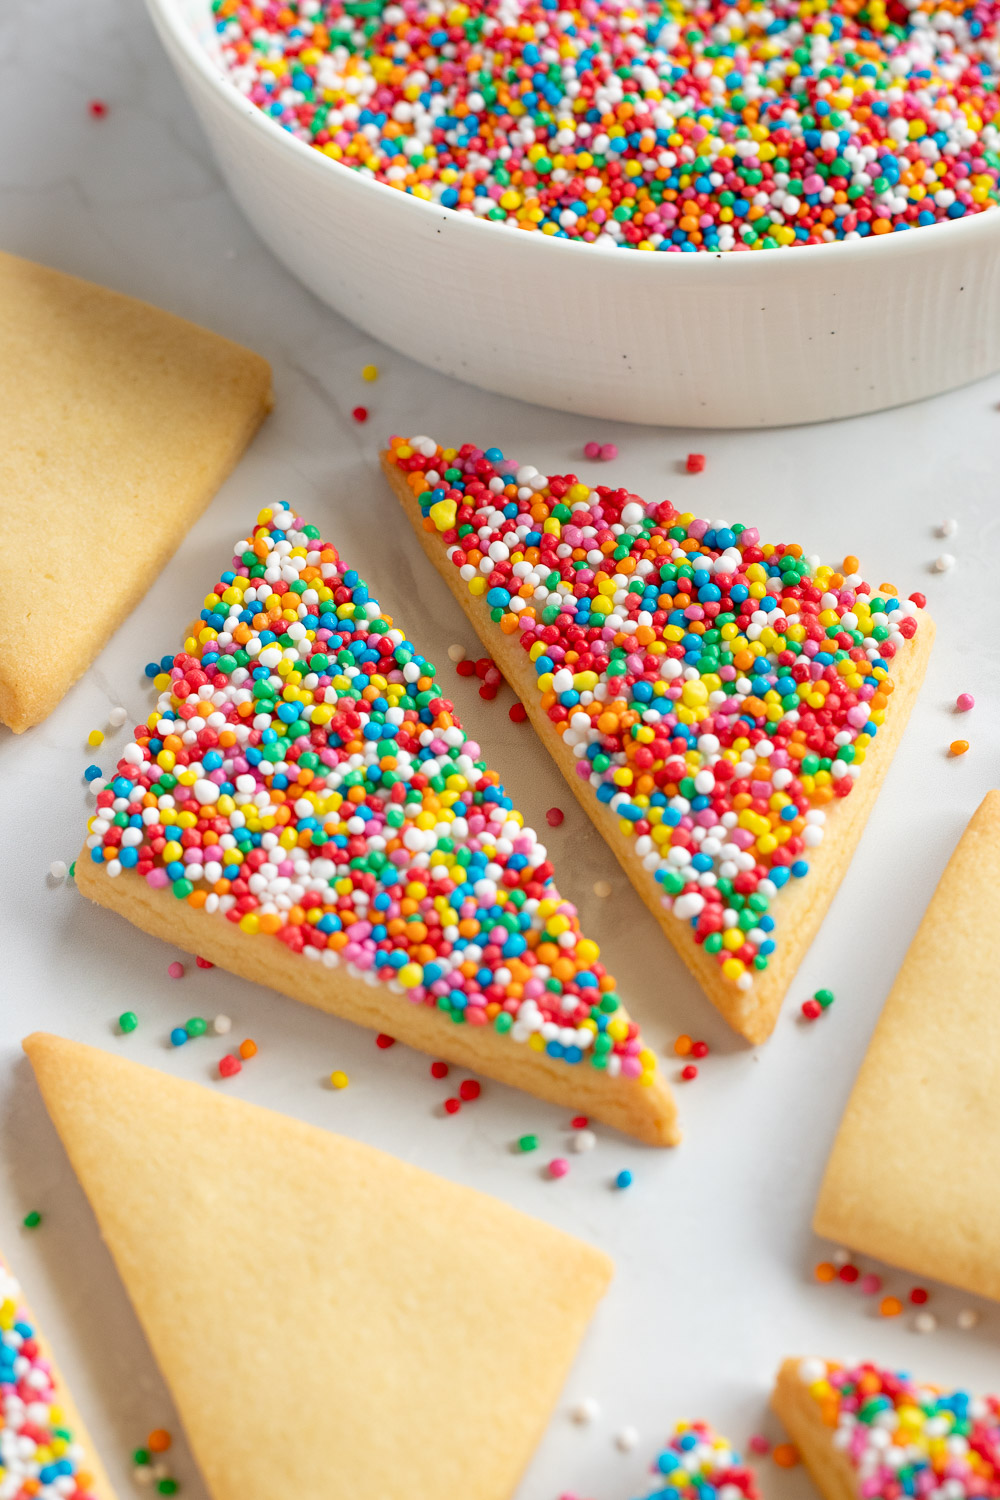
Fairy bread, reinvented. A crisp, buttery shortbread base, a simple butter icing, and a shameless amount of colourful sprinkles. All the nostalgia of the classic Aussie party snack, but now with a little extra crunch — a fun treat for kids and grown-ups alike.
Jump to…
What is Fairy Bread?
If you’re asking this question, you probably didn’t grow up in Australia in the 80’s or 90’s — AKA the peak fairy bread era. To be fair, neither did I. But since moving back to Australia as a fully grown adult, I’ve definitely been spotted hovering around plates of fairy bread at kid’s birthday parties (strictly for research purposes, of course).
Let me introduce you to this iconic Australian snack.
At its core, fairy bread consists of three ingredients: bread, butter and 100’s and 1000’s (those tiny, round sprinkles). Seems simple, right? Wrong. Australians take their fairy bread very seriously, and there are some strict rules that must be followed:
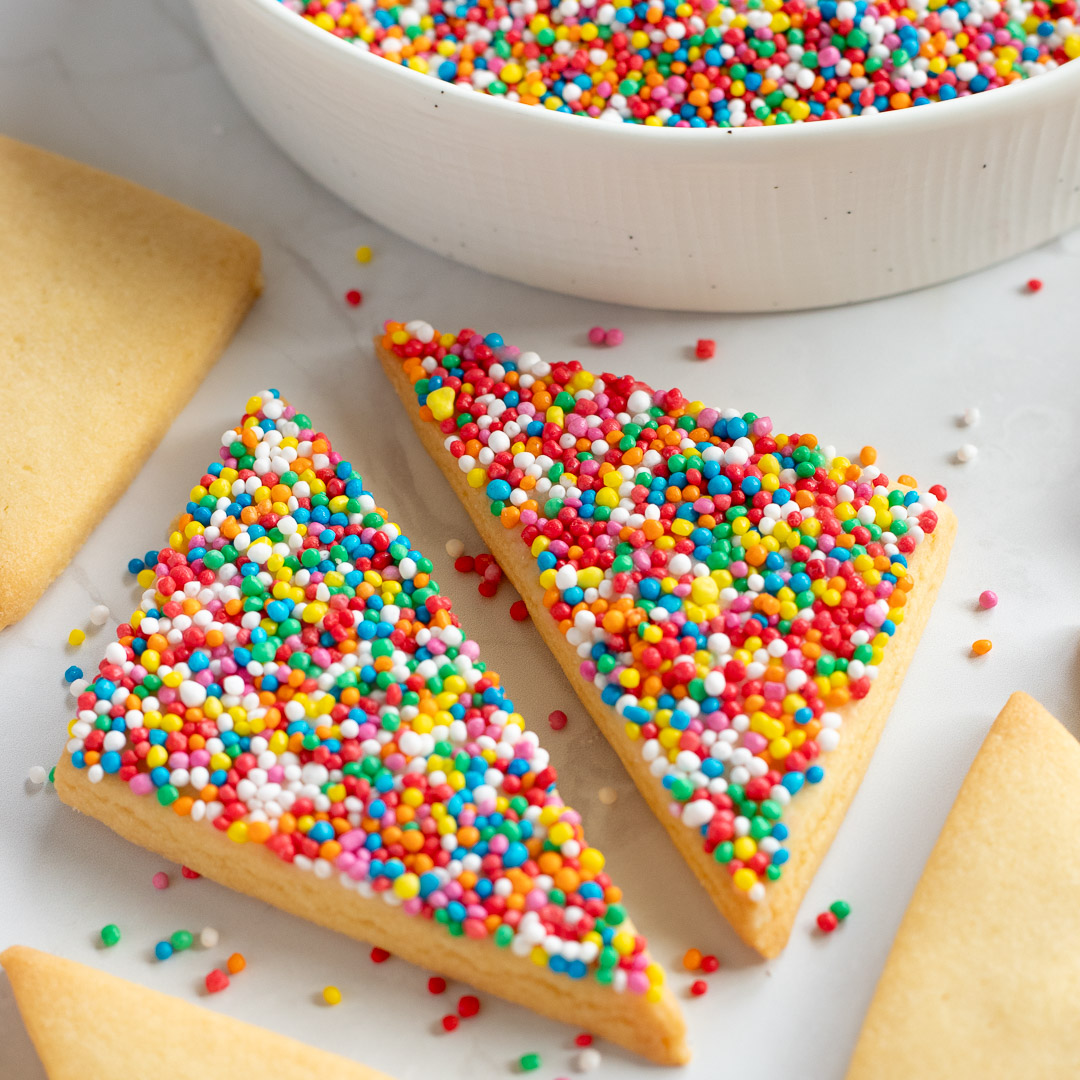
While I’ve taken some creative liberties in developing this recipe, I’ve tried to stay true to the nostalgic joy of classic fairy bread. These buttery, crumbly shortbread cookies are shaped like small slices of bread, topped with a thin layer of buttery icing, and absolutely drenched in 100’s and 1000’s (as they should be). I assure you, no crusts were cut in the making of these cookies.

You Need to Chill. Here’s Why.
As a wise man once said, good shortbread comes to those who wait. Or something like that…
In all seriousness, if you want nicely shaped shortbread triangles, that actually resemble slices of bread, then the dough needs time to chill in the fridge. Twice.
The first chill (at least 30 mins) helps the butter re-solidify after you’ve mixed everything together. It’s way easier to handle the dough when cold, and it won’t stick to everything in sight. Pressing your dough into a thinner disc before refrigerating will help it to firm up faster.
The second chill (15-30 mins) comes after you’ve rolled and cut your dough. This step prevents the cookies from spreading or losing their shape during baking, because cold butter takes much longer to melt in the oven than soft or room-temperature butter.
Don’t believe me? Check out the photo. These cookies were all cut from the same dough and baked at the same temperature for the same amount of time. The only difference is the duration of the second chill. While you can get away with 15 minutes, I’d recommend the full half hour, if you can afford it.

Ingredients
For the shortbread cookies
If you’ve ever made shortbread before, these ingredients will look pretty familiar. This recipe sticks to the classic 3:2:1 ratio (by weight) of flour, butter, and sugar, delivering a perfectly buttery shortbread every time.
- Butter: use softened butter. Soft enough that you can easily leave an indent when you press it with your finger.
- Icing sugar (AKA confectioners’ sugar or powdered sugar): I prefer icing sugar over granulated sugar here because it dissolves better in the butter and produces a lighter and more tender shortbread.
- Vanilla extract — technically optional, but it gives the shortbread a nice flavour boost.
- Egg yolk: okay, this is a little controversial when it comes to shortbread, but egg yolk makes the dough much more pliable and easier to work with. Because we’re cutting the dough into custom shapes, it requires a bit more handling than your typical shortbread, and you don’t want your cookies breaking or crumbling on you. Just go with it, and you’ll thank me later.
- Plain flour — not self-raising! Shortbread with leavening isn’t really shortbread.
- Salt: leave this out if using salted butter.
- 100’s and 1000’s (for decoration): this is what we call sprinkles in Australia and New Zealand. They’re tiny, round, colourful, and guaranteed to end up all over your kitchen floor. I hope you’ve got your vacuum handy! If you’re not in Aus/NZ feel free to substitute with any kind of sprinkles.

For the butter icing
This is a super simple icing that comes together in less than 5 minutes. It doesn’t set rock hard like royal icing, but it definitely firms up enough to hold the sprinkles in place. And all you need is 4 ingredients!
- Butter: it wouldn’t be fairy bread without butter! We’re going to melt it, so no need to soften it first.
- Milk — just a dash to help it all come together.
- Vanilla extract: again, this is optional, but always recommended for extra flavour!
- Icing sugar sweetens and thickens the icing. Use the full amount, or your icing will be too thin and runny. Don’t worry, you’re only going to spread a thin layer of icing on each cookie, so it won’t be overly sweet.
*For precise measurements, please refer to the recipe card below
How to Make Fairy Shortbread
Make the shortbread cookies
1. Cream the butter and sugar – Using a hand mixer (or stand mixer with the whisk attachment), cream together the softened butter, icing sugar, and vanilla extract until pale and creamy. This should take about 2-3 minutes.
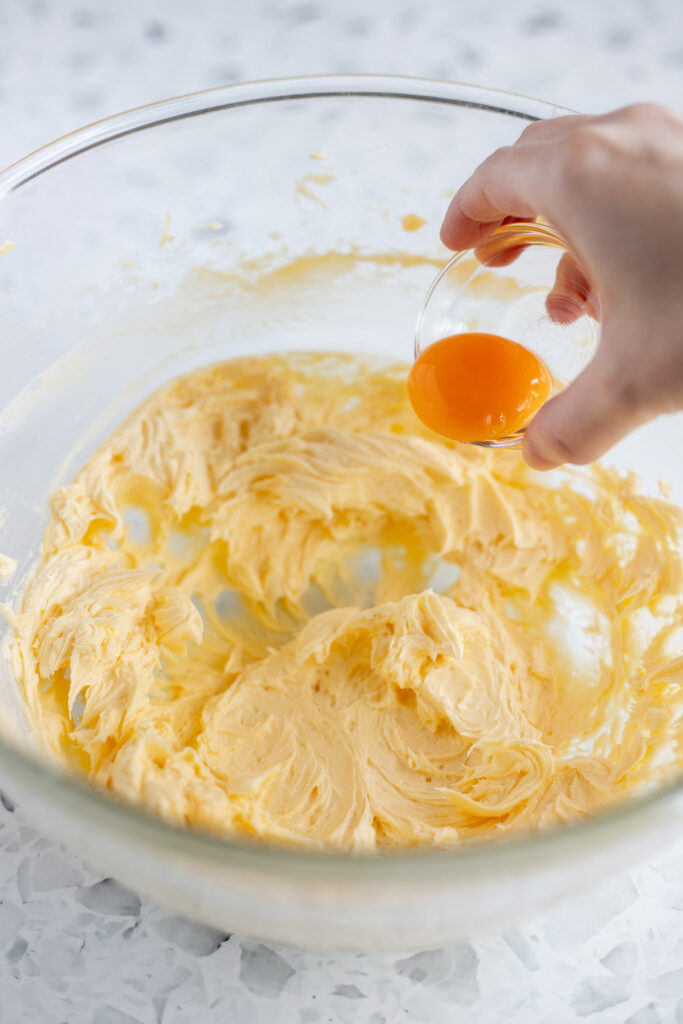
2. Mix in the egg yolk – Add the yolk and beat until the mixture is smooth and combined.
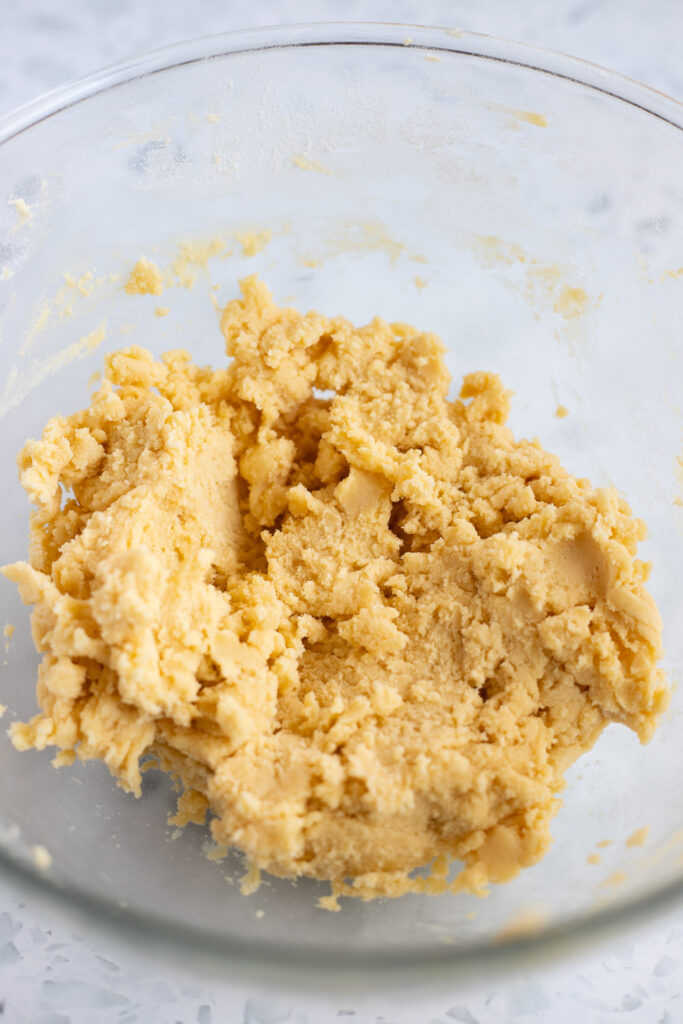
3. Mix in the flour – Beat in the flour a little bit at a time (so that it doesn’t puff up in your face!). The mixture will seem very dry and crumbly at first. Refrain from adding any liquid — just keep mixing, and it will come together into a rough dough after a minute or two.
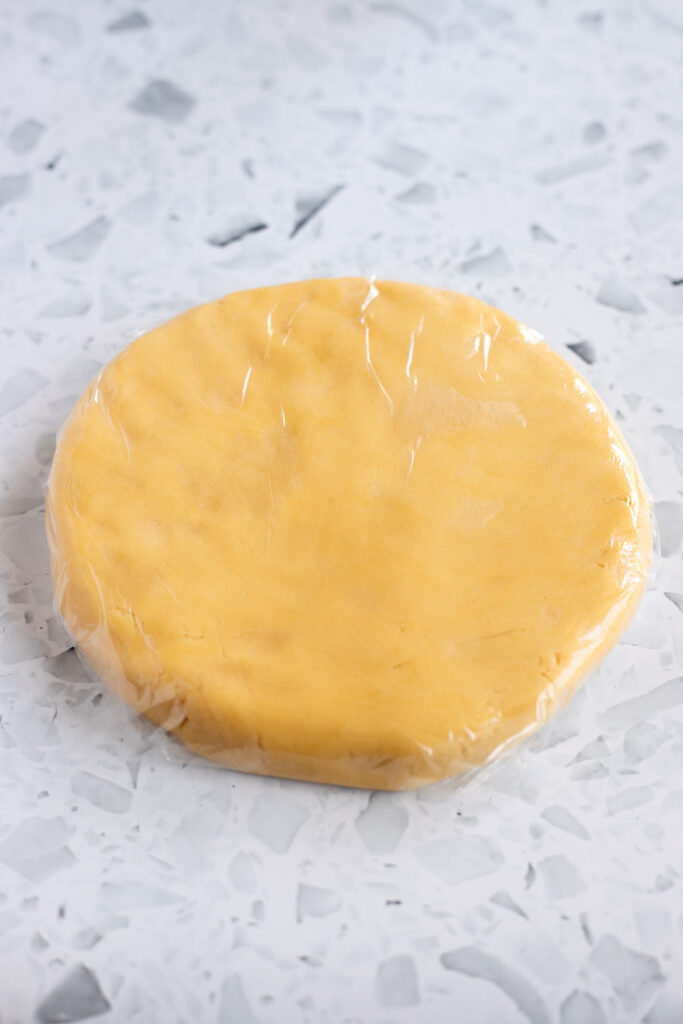
4. Chill the dough – Use your hands to bring the dough together into a ball, but don’t knead it! Flatten it into a disc, wrap tightly with cling film, and pop it in the fridge to firm up for at least 30 minutes. If you’re not ready to bake yet, you can keep the dough in the fridge like this for up to 3 days.
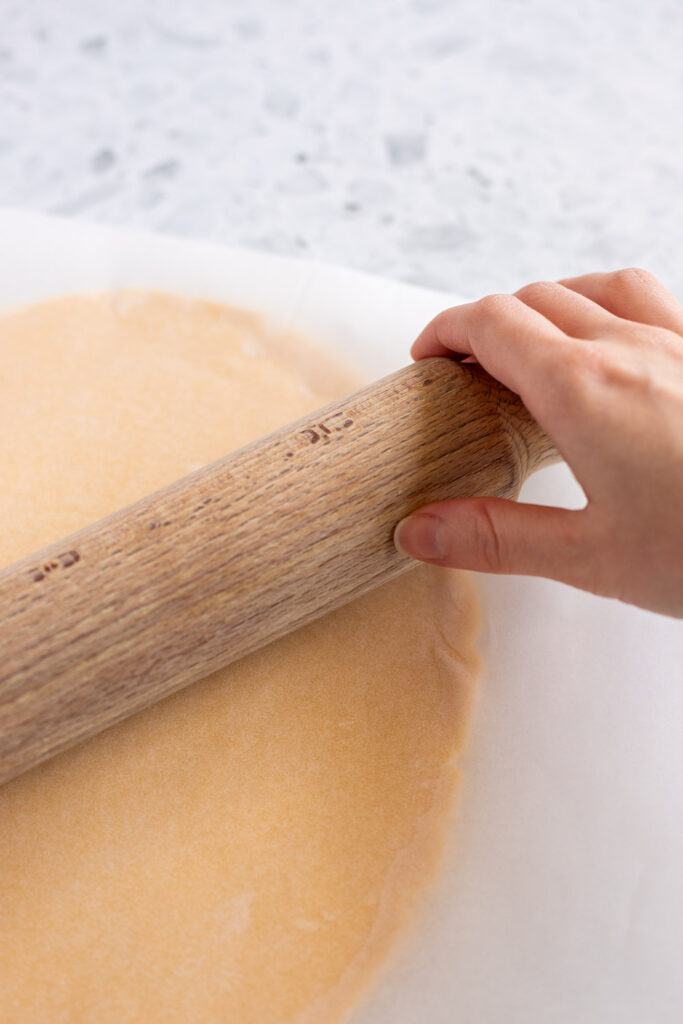
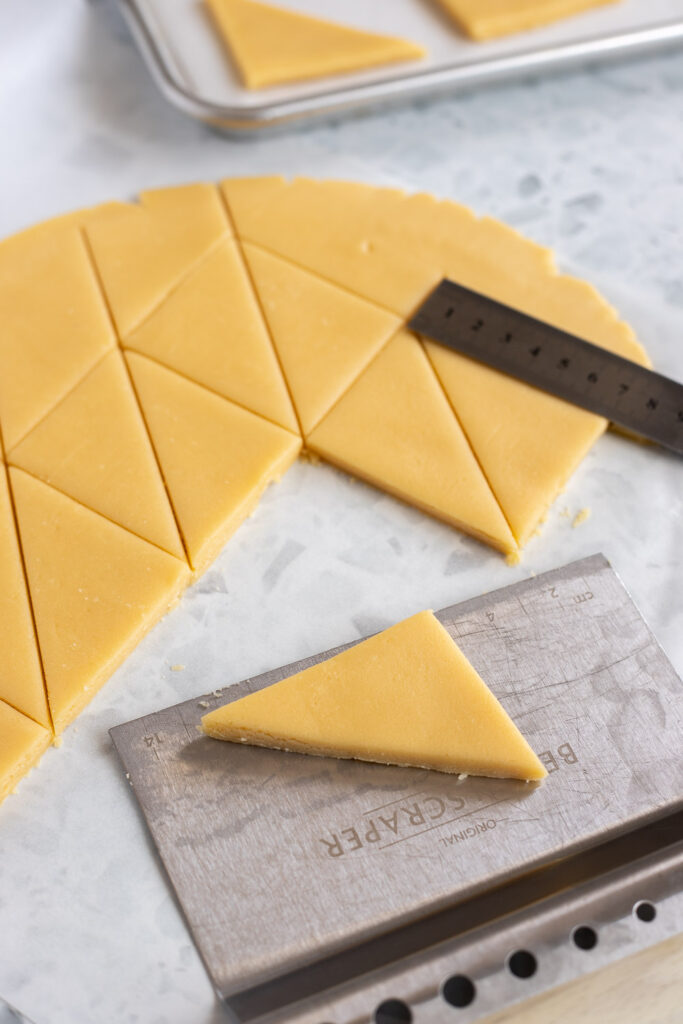
5. Roll and cut – Remove the dough from the fridge and roll it out between two pieces of parchment paper. This prevents the dough from sticking, without drying it out with extra flour. Aim for a thickness of around 6-7 mm (1/4 inch). Use a pizza cutter, a bench scraper, or a sharp knife to cut the dough into 6 x 7 cm rectangles. I suggest using a ruler as a guide, rather than eyeballing it. Then cut each rectangle diagonally to form two triangles, or “bread slices.” Gather up the scraps, re-roll the dough, and cut out more cookies.

6. Chill again – Arrange the shortbread on a parchment-lined baking sheet, leaving at least 2 cm of space between each cookie. Use two trays if you have them, otherwise you’ll have to work in batches. Place in the fridge for another 15-30 minutes to prevent spreading. While the dough chills, preheat your oven to 160°C (140°C fan/325°F).
7. Bake – Bake the shortbread for 12-15 minutes or until the edges are lightly golden. If, despite your best efforts, the cookies have spread, you can gently reshape them while they are still soft and warm. Take a straight-edged tool (like a bench scraper) and use it to nudge the sides back into shape. Just be careful, as they’ll be hot! Allow them to firm up on the tray before transferring them to a wire cooling rack.
Make the butter icing
1. Melt the butter – place the butter and milk in a microwave-safe bowl, and heat in 10-second bursts until melted.
2. Add the vanilla and icing sugar – add the vanilla extract, then sift in the icing sugar. Stir or whisk by hand until smooth. The icing will be on the thinner side but should be thick enough to coat the back of a spoon. It will continue to thicken further as it cools.
Decorate
1. Set up – Line up your workstation with the cooled shortbread cookies, the butter icing, and a shallow dish of sprinkles. The icing will begin to set fairly quickly once it hits the shortbread, so you’ll want to decorate them one at a time.
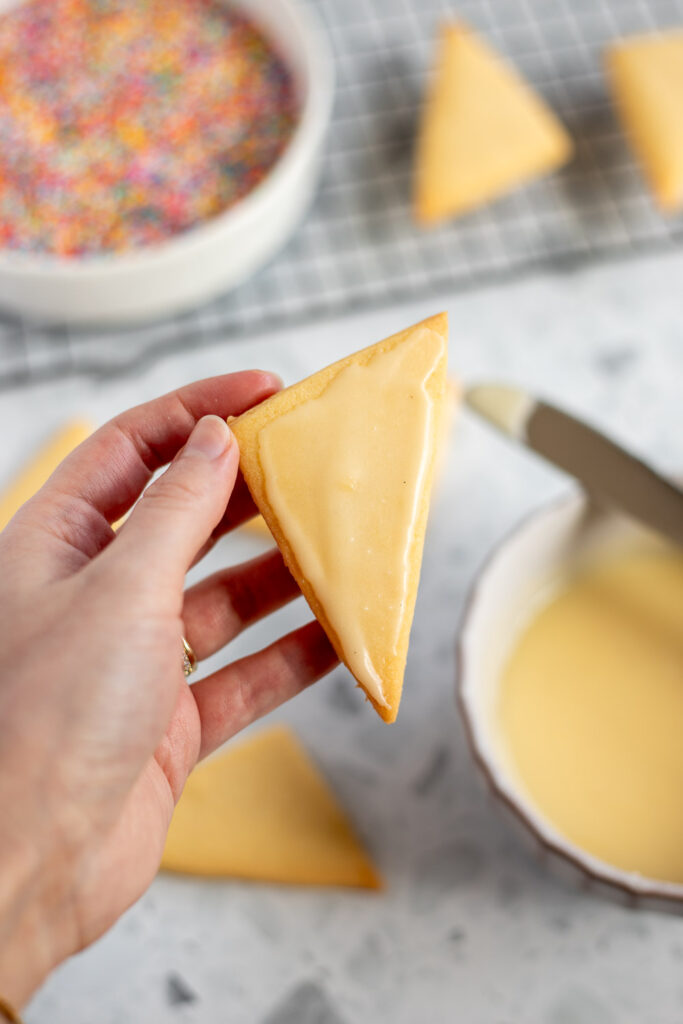
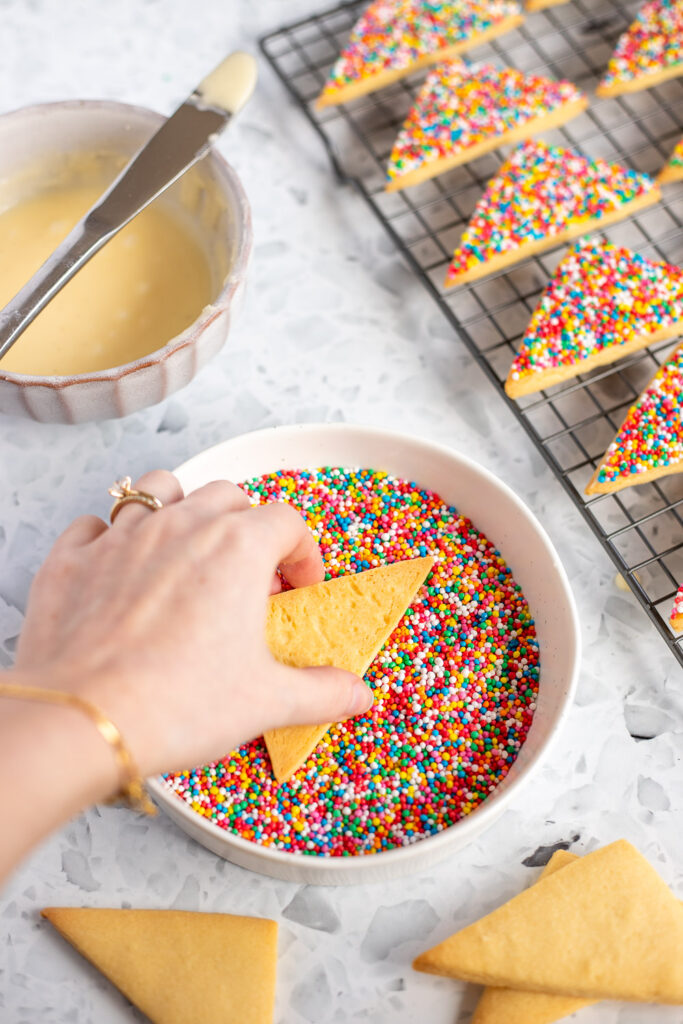
2. Glaze and sprinkle – Take a cookie and spread a thin layer of icing on top using a butter knife or offset spatula. You only need enough for the sprinkles to stick — too much icing and things will get messy. Place the iced side of the cookie face down in the sprinkles, then lift it up, and gently shake off any excess. If some sprinkles spill over the edges, use your fingers or a clean knife to tidy things up. Repeat with the remaining cookies.
3. Let the icing harden – Place the finished fairy shortbread on a plate or cooling rack and allow to set (at least 10 minutes). Once the icing has firmed up, you can stack or store them without any smudging.

Switch It Up
I know I gave you a whole spiel about the “rules” of fairy bread, but if you feel like going rogue, here are a few ways to do it:
Christmas Fairy Shortbread
Swap the rainbow sprinkles for red, green, and white — you can find festive 100’s and 1000’s at the supermarket around Christmas time here in Australia. To serve, arrange the shortbread cookies on a plate in the shape of a Christmas tree.
Dutch Hagelslag Shortbread (Choc Sprinkles)
Hagelslag is the Dutch-equivalent of fairy bread, but instead of 100’s and 1000’s, it’s covered in their own variety of oblong, chocolate sprinkles. While not 100% authentic, you can replicate the look of Hagelslag using any long, chocolate sprinkles you have on hand!
Kid-Friendly Version
Baking with little ones? You can use cookie cutters to shape the dough into, circles, stars, or whatever your heart desires. Unless of course your kids are good at geometry and won’t be alarmed by the presence of a ruler. In which case, stick to the triangles! 😆
Fairy Shortbread
* Please note: all cup measurements are approximate and based on Australian standard cups (250ml). For best results, weigh your ingredients with a kitchen scale.
Equipment
- hand mixer, or stand mixer with the whisk attachment
- rolling pin
- bench scraper, or pizza cutter or a sharp knife
- baking sheet(s)
- ruler, optional (helps with cutting even triangles)
Ingredients
For the shortbread
- 170 g (⅔ cup) butter, softened
- 85 g (½ cup + 1 tbsp) icing sugar, sifted
- 1 tsp vanilla extract
- 1 egg yolk, room temp
- 260 g (2 cups) plain flour, spooned and levelled if using cups
- ¼ tsp salt, omit if using salted butter
- 190 g (1 cup) 100's and 1000's (round rainbow sprinkles), see Note 1
For the butter icing
- 20 g (4 tsp) butter
- 20 ml (4 tsp) milk
- ½ tsp vanilla extract
- 120 g (¾ cup + 1 tbsp) icing sugar, sifted
Instructions
Make the shortbread
- In a mixing bowl, cream the butter, icing sugar, and vanilla together until pale and creamy (a couple of minutes).
- Add the egg yolk and beat until just combined.
- Gradually add the flour and salt (if using) and beat until the mixture forms a crumbly dough. It may seem dry at first, but keep mixing and it will come together.
- Use your hands to form the dough into a disc. Wrap tightly with cling film, and chill for 30-60 minutes. The dough can stay in the fridge like this for up to 3 days, if you'd like to make it in advance.
- Remove the dough from the fridge and roll it out between two pieces of parchment paper until roughly 6-7 mm (¼ inch) thick. Cut the dough into 6 x 7 cm rectangles using a ruler as a guide. Then, cut each rectangle diagonally to form 2 triangular "bread slices." Gather the dough scraps, re-roll, and cut more cookies. If the dough starts to feel quite soft or greasy at any point, place it back in the fridge for 5-10 minutes to firm up.
- Place the formed shortbread on a parchment-lined baking sheet, making sure there is at least 2 cm of space around each cookie. Chill for 15-30 minutes to minimise spreading. In the meantime, preheat your oven to 160℃ (140℃ fan/325℉).
- Bake the shortbread for 12-15 minutes, or until lightly golden around the edges. If they have spread during baking, you can use a bench scraper or any tool with a straight edge to carefully straighten the sides while warm. Allow to cool and firm up on the baking sheet for a few minutes before transferring to a wire rack.
Make the butter icing
- Place butter and milk in a small microwave-safe bowl. Microwave in 10-second increments until the butter is just melted.
- Add the vanilla extract and sifted icing sugar to the melted butter mixture. Whisk together until smooth and the icing is thick enough to coat the back of a spoon. The icing will continue to thicken as it cools.
Decorate
- Set up an assembly line with your fully cooled shortbread cookies, butter icing, and a shallow dish of sprinkles. You'll want to work with one cookie at a time as the icing will begin to set quickly once spread.
- Take a shortbread triangle and spread a thin layer of icing on top, then press the iced side face-down in the sprinkles to coat. You can use your finger or a butter knife to carefully neaten up the edges and remove any excess sprinkles.
- The icing should fully set within about 10 minutes, at which point the cookies are ready to eat!