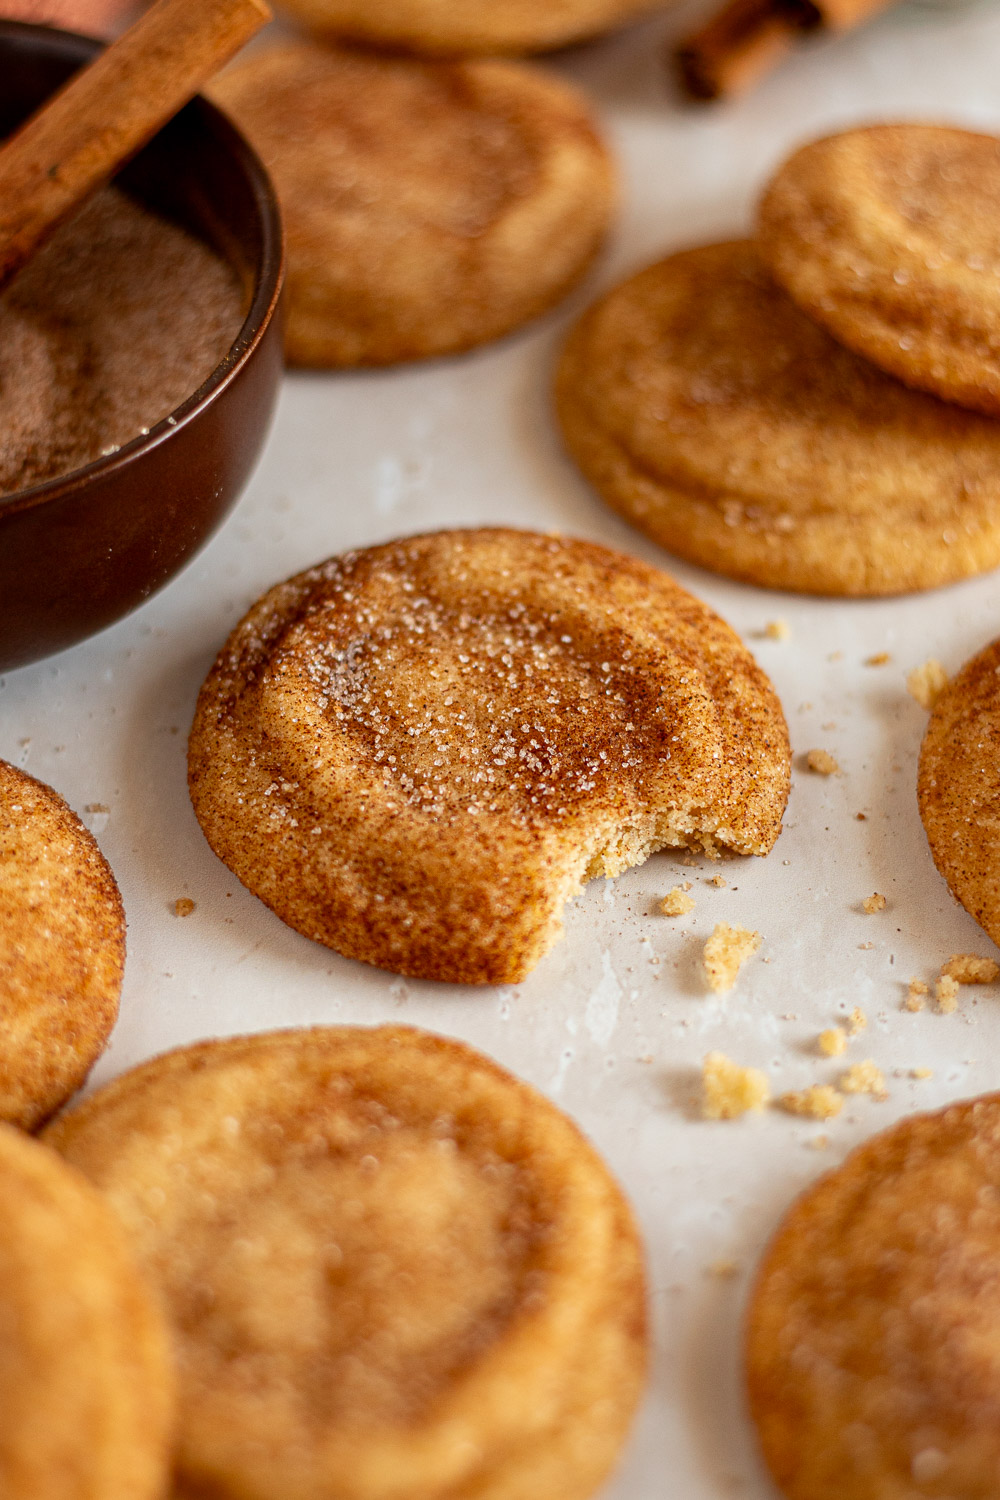
Sweet cinnamon-sugar bliss in 25-minutes flat. These no-chill snickerdoodles are made with melted butter and a simple pan-banging trick for chewy, wrinkled edges and soft, buttery middles. A classic American cookie that’s anything but boring.
Jump to…
Ironically snickerdoodles are not something I grew up eating. In fact, I lost my snickerdoodle virginity in Australia of all places when a coworker of mine cornered me with a holiday cookie platter. Hearing the name “snickerdoodle,” I braced myself for a cookie stuffed with Snickers bars. Much to my delight, these have nothing to do with candy…or poodles for that matter (phew!).
Snickerdoodles are basically a cinnamon sugar cookie made from simple pantry ingredients — the most important being cream of tartar. The dough is shaped into balls and rolled in cinnamon sugar before baking. I’ll admit, some snickerdoodles are nothing to write home about, but a good one? A good one could have even the most staunch chocolate chip cookie fans questioning their loyalty.

What Sets These Snickerdoodles Apart
You would be right to point out that there are already “oodles” (sorry, I had to do it!) of snickerdoodle recipes out there. But after a lot of testing, I found most missed the mark — they were either too light and airy or too thin and crispy. These snickerdoodles land right in that elusive sweet spot, with crisp, chewy edges, and soft, pleasantly dense centres.
Why this recipe works
What Does Cream of Tartar Do?
You may have used cream of tartar before to stabilise meringue or polish your stainless steel pans, but this white, powdery substance is also what differentiates snickerdoodles from a standard sugar cookie. Its job here is two-fold: firstly, it activates the baking soda, enhancing the chew factor; and secondly, it adds a distinctive tangy flavour. “Tangy” and “cookie” may not sound like a very good duo, but it works — in moderation of course.

Ingredients (There’s Only 9!)
- Plain flour: stick to plain/all-purpose flour, and measure it carefully. Too much flour and your cookies won’t spread. More on this here.
- Cream of tartar: this can usually be found in the baking aisle near the baking soda and baking powder. I haven’t tested this recipe without cream of tartar, but I’m quite certain the flavour and texture wouldn’t be the same.
- Baking soda: make sure your baking soda is still in-date or else your snickerdoodles won’t puff up like they’re supposed to.
- Salt: reduce by half if using salted butter.
- Melted butter: Use a good-quality butter! Some of my favourites for baking are Lurpak, Président, and Westgold. To melt your butter, cut it into small pieces and microwave in short 10-20 second bursts until just barely melted. Let cool to room temperature before using. You can pop it in the fridge to speed this up, but be careful it doesn’t get too cold and start to re-solidify.
- Sugar: either granulated sugar or caster sugar will work. I prefer granulated sugar because I feel like the larger granules give the snickerdoodles a crunchier outer crust.
- Cinnamon: this goes in both the cinnamon sugar and the cookie dough for a warm, sweet cinnamon flavour throughout. Adjust the amounts as you please!
- Egg + egg yolk: the extra egg yolk adds richness without excess moisture. It also helps keep the snickerdoodles soft. Use large eggs (around 55g each) and bring them to room temperature first.
- Vanilla: vanilla extract or vanilla bean paste are both fine. Use whatever you have on hand!
*For the full list of ingredients with measurements, see the recipe card below
How to Make Soft & Chewy Snickerdoodles
1. Prep – Preheat your oven to 190°C (170°C fan/375°F) and line a couple baking sheets with parchment paper.
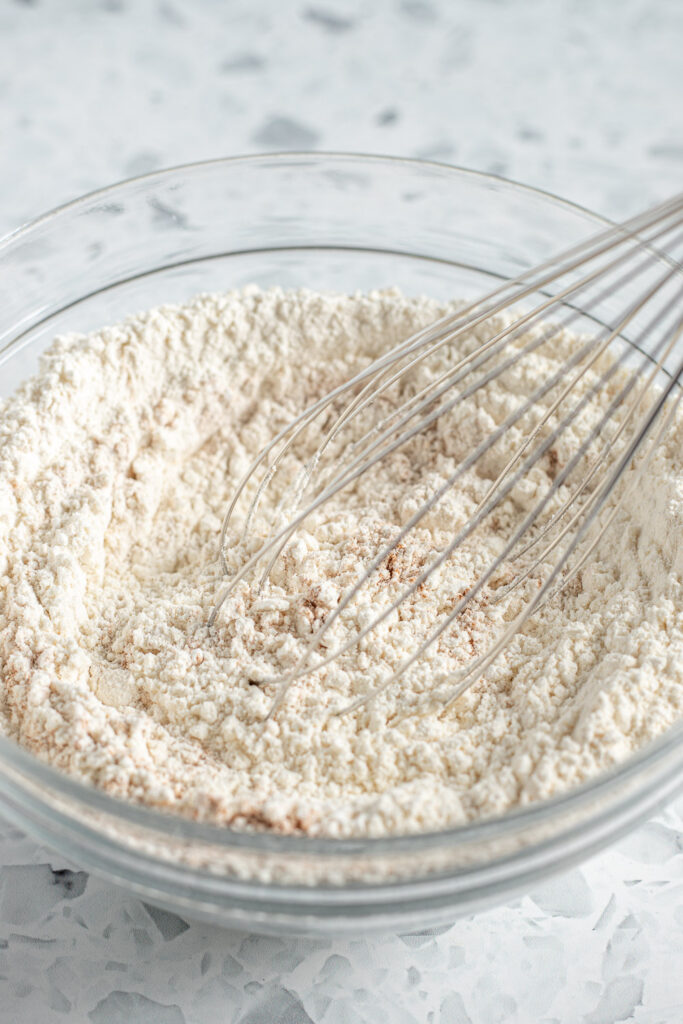
2. Combine the dry ingredients – Add the flour, cinnamon, cream of tartar, baking soda, and salt to a bowl. Whisk well to combine, and set aside.
3. Whisk the butter and sugar – In a large mixing bowl, vigorously whisk the melted butter and sugar together until it thickens and lightens to a pale yellow. This takes about 90 seconds for me. The sugar won’t fully dissolve, so don’t worry if it looks grainy.
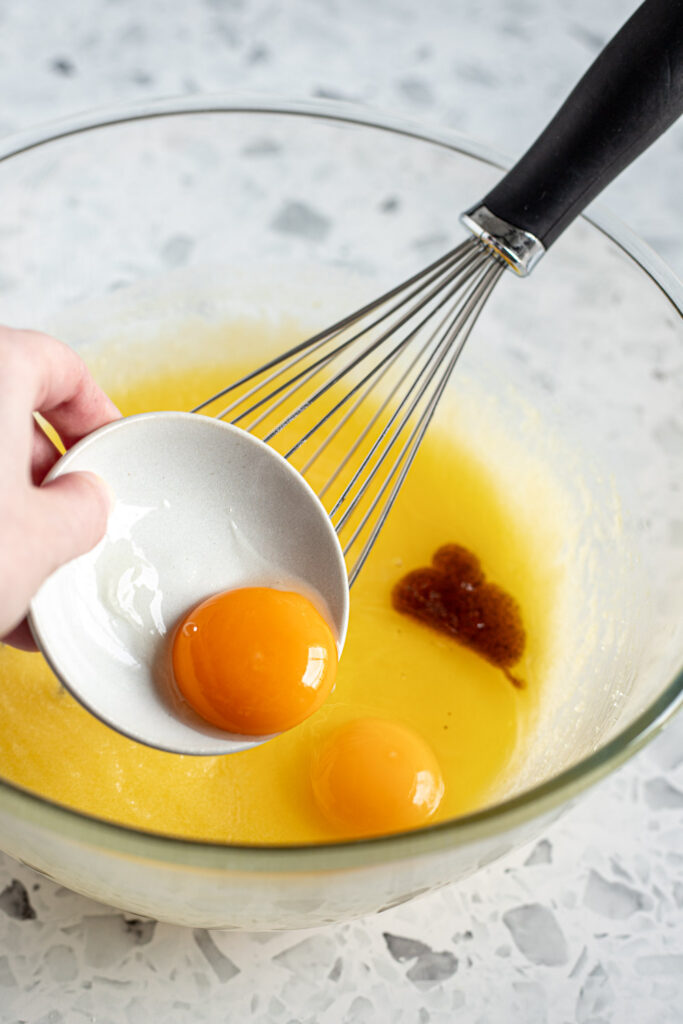
4. Add the egg and vanilla – Mix in the egg, the extra egg yolk, and the vanilla until just combined.
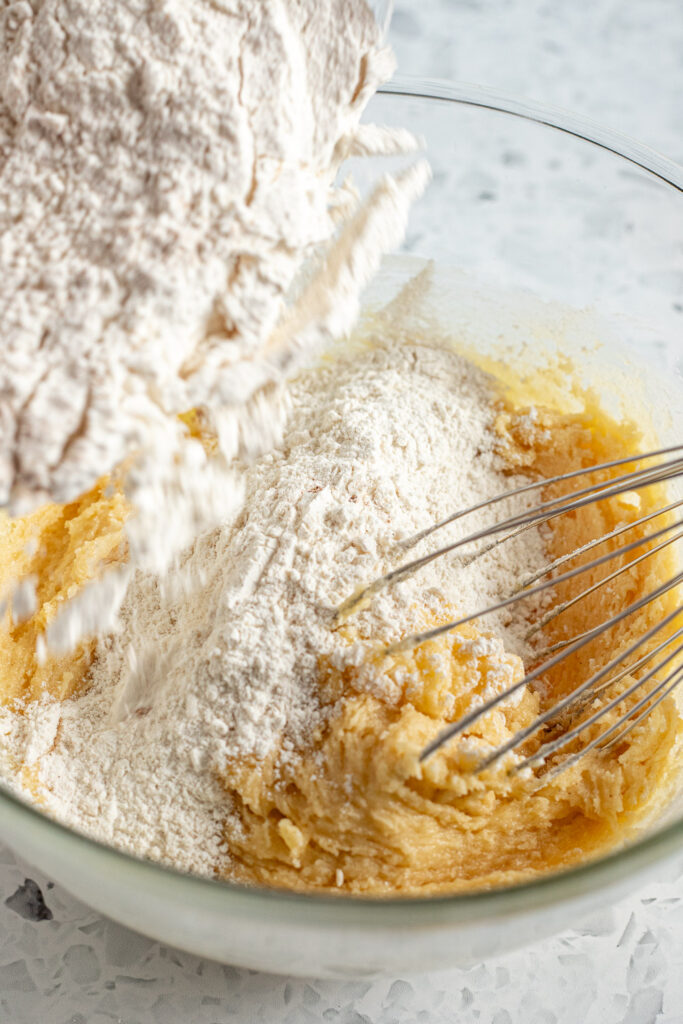
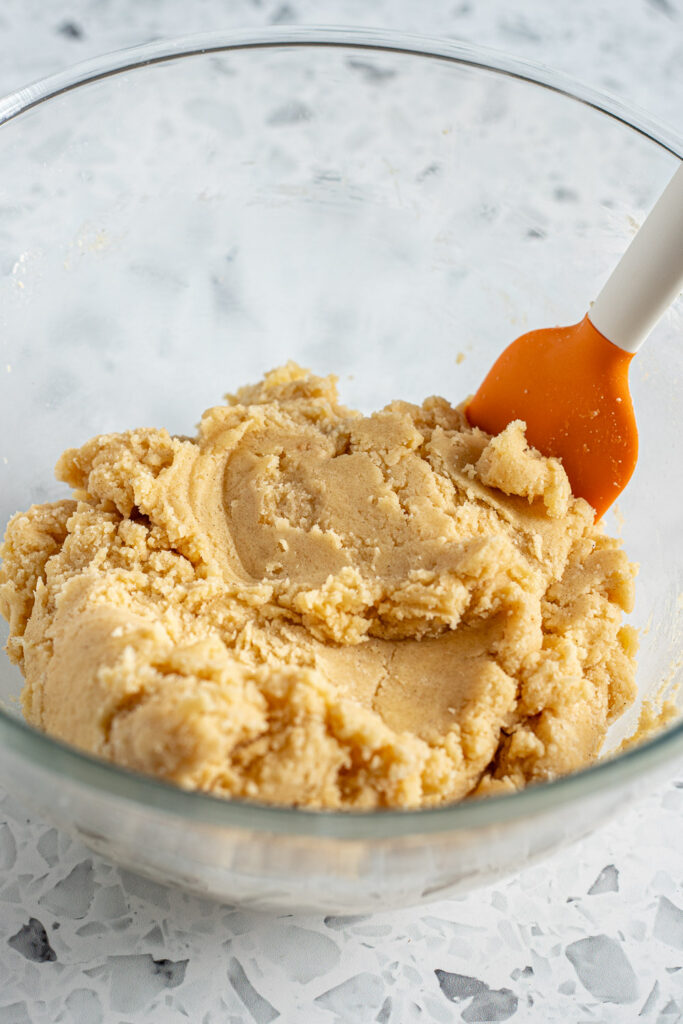
5. Mix in the dry ingredients – Gradually add the dry ingredients. I do this in about 3 batches. Start with the whisk, then switch to a rubber spatula as the dough gets thick. Make sure to scrape the bottoms and sides of the bowl as you go, and don’t over-mix it!
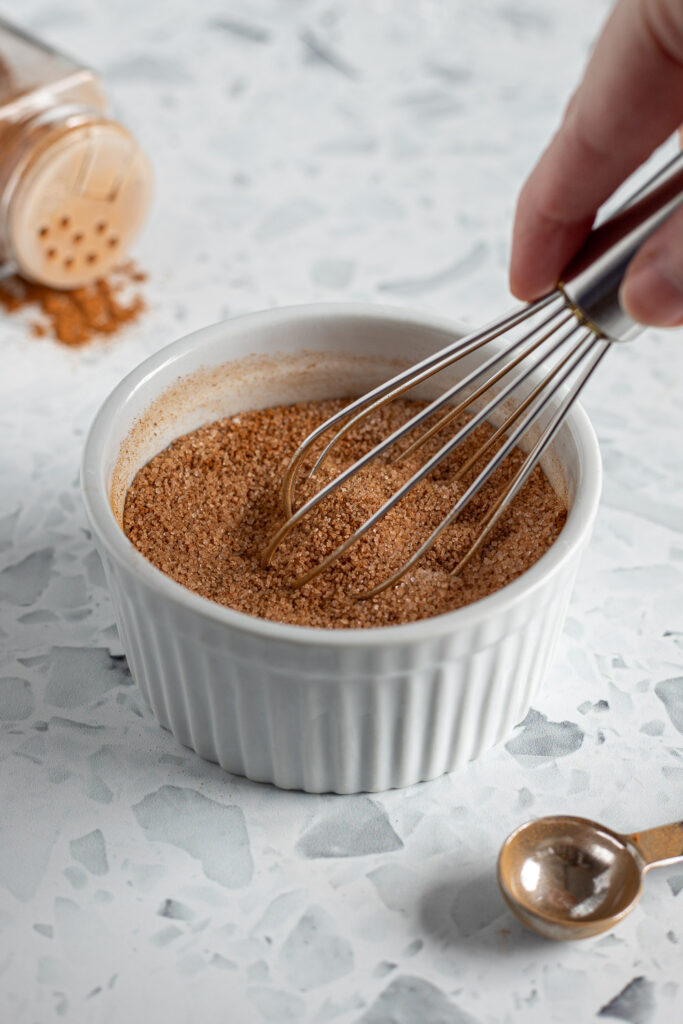
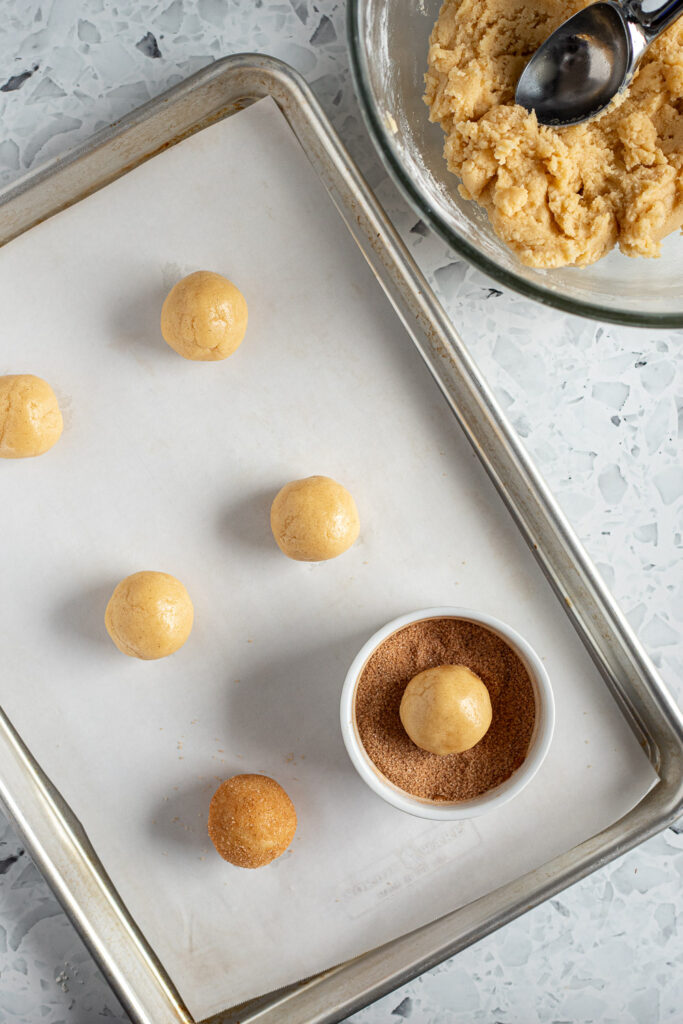
6. Make the cinnamon sugar – In a small bowl, combine the cinnamon sugar ingredients.
7. Form the cookies – For a medium-sized cookie, scoop roughly 2 tbsp or 35g of dough and roll between your palms to form a smooth ball. Roll each ball twice in the cinnamon-sugar mixture until well coated, then place the balls at least 5 cm (2 inches) apart on a baking tray.

8. Bake – Bake on the middle rack for 5-6 minutes, or until the balls have started to spread and puff up in the middle. Quickly open the oven and, wearing oven mitts, lift the tray about few inches and gently let it drop back down on the oven rack. Close the door and continue baking for a further 2 minutes, then repeat the lifting and dropping process. Bake for 9-11 minutes total until the edges of the cookies look set, but the centres are still a little pale and underdone. Remove from the oven and drop once more on the countertop to deflate the centres.
9. Cool – Let cool on the baking tray for 5-10 minutes before transferring to a wire rack. The cookies are very delicate while warm, so don’t try to move them too soon. If you have any leftover cinnamon sugar, you can sprinkle this on top of the warm snickerdoodles.

Tips for Perfect Snickerdoodles
- Preheat your oven in advance. Cookies spread far more at lower temperatures. Make sure your oven has plenty of time to fully reach 190°C before your first tray goes in. I recommend at least 30 minutes before.
- Measure your flour correctly. I mean it! Even 10g of extra flour can be the different between thick and flat cookies. Please use a scale if you have it. And if you must use cups, never scoop or pack the flour — instead spoon the flour into the cup, then level off the top with a knife.
- Keep the dough at room temperature. This recipe is designed to be baked straight away, so keep the dough out on the countertop between batches. If you do find yourself needing to chill it, give it time to warm back up to room temperature before baking, or else your cookies won’t spread properly.
- Use parchment paper instead of silicone mats. I love my Silpat, but cookies need something to grip onto as they bake, and silicone is just too slippery!
- Let your trays cools. Never place cookie dough on a warm baking tray, or it will start to melt from the residual heat. I like to rotate between two trays so one is always cool and ready for the next batch.
How to Adjust Thickness
Ultimately, cookies can turn out differently depending on your oven, the climate you’re in, and even the brand of butter you use. Whenever I make cookies, I like to bake a “test cookie” first to see how the dough behaves in the oven. This gives you the chance to make small adjustments before committing to the rest of the batch.
For thinner cookies: flatten the dough balls slightly before baking and/or reduce the oven temperature to 180°C.
For thicker cookies: add a little extra flour (no more than 1 tbsp at a time) and/or increase the oven temperature to 200°C.

Snickerdoodle Variations to Try
If you want to go the extra mile, try browning the butter first! Just make sure you measure the butter after browning because it will lose about 20-25% of its weight from water evaporation as it cooks.
You could also transform these into spiced snickerdoodles by adding a blend of your favourite warm spices. I reccommend nutmeg, clove, all-spice, and cardamom (a seriously underrated spice in American baking).
* Please note: all cup measurements are approximate and based on Australian standard cups (250ml). For best results, weigh your ingredients with a kitchen scale.
Equipment
- 1-2 baking sheet(s)
Ingredients
For the cookie dough
- 390 g (3 cups) plain flour, spooned and levelled if using cups
- 1 ½ tsp cream of tartar
- 1 tsp baking soda
- ½ tsp salt, reduce to ¼ tsp if using salted butter
- 250 g (1 cup) butter, melted and cooled to room temperature
- 330 g (1 ½ cups) granulated sugar, or caster sugar
- ½ tsp ground cinnamon, adjust to taste
- 1 egg + 1 egg yolk, room temperature
- 1 tsp vanilla, vanilla extract or vanilla bean paste
For the cinnamon sugar
- 70 g (cup) granulated sugar, or caster sugar
- 2 tsp ground cinnamon
Instructions
- Preheat the oven to 190℃ (170℃/375℉) and line two baking sheets with parchment paper.
- Whisk together the flour, cinnamon, cream of tartar, baking soda, and salt. Set aside.
- To a large mixing bowl, add the sugar and cooled melted butter. Whisk vigorously for 1-2 minutes, until the mixture lightens in colour and thickens slightly.
- Add the egg, egg yolk, and vanilla, and whisk until just combined.
- Add the dry ingredients in 3 batches, mixing between each addition. Switch to a rubber spatula when the dough becomes too thick to whisk. Do not over-mix!
- In a small bowl or ramekin, whisk together the cinnamon sugar ingredients.
- Scoop about 2 tbsp of dough, and roll between your palms to form a smooth ball. if you want to be precise, use a scale (mine are 35g each). Roll each dough ball twice in the cinnamon sugar, then place on a lined baking sheet, leaving at least 5 cm (2 inches) of space in between to allow for spreading.
- Place the tray on the middle rack of the preheated oven. After 5 minutes, open the oven door and, using oven mitts, lift the tray a few inches and let it drop firmly back onto the rack (the cookies should deflate slightly). Close the door and bake for another 1–2 minutes until they puff up again. Repeat this lifting and dropping process once more. Bake for a total of 9–11 minutes until the edges are set but the centres remain slightly underbaked. Remove from the oven and give the tray one final drop on the countertop.
- Let the snickerdoodles cool on the baking sheet for 5-10 minutes before transferring to a wire rack. Sprinkle with any leftover cinnamon sugar, if desired.