Some links in this post are affiliate links. I may earn a small commission if you purchase through them.
Master the art of making pie crust by hand with this flaky, all-butter shortcrust pastry. A versatile, beginner-friendly recipe for sweet or savoury pies, tarts, and quiches — complete with all the tips you need to avoid common pastry pitfalls!
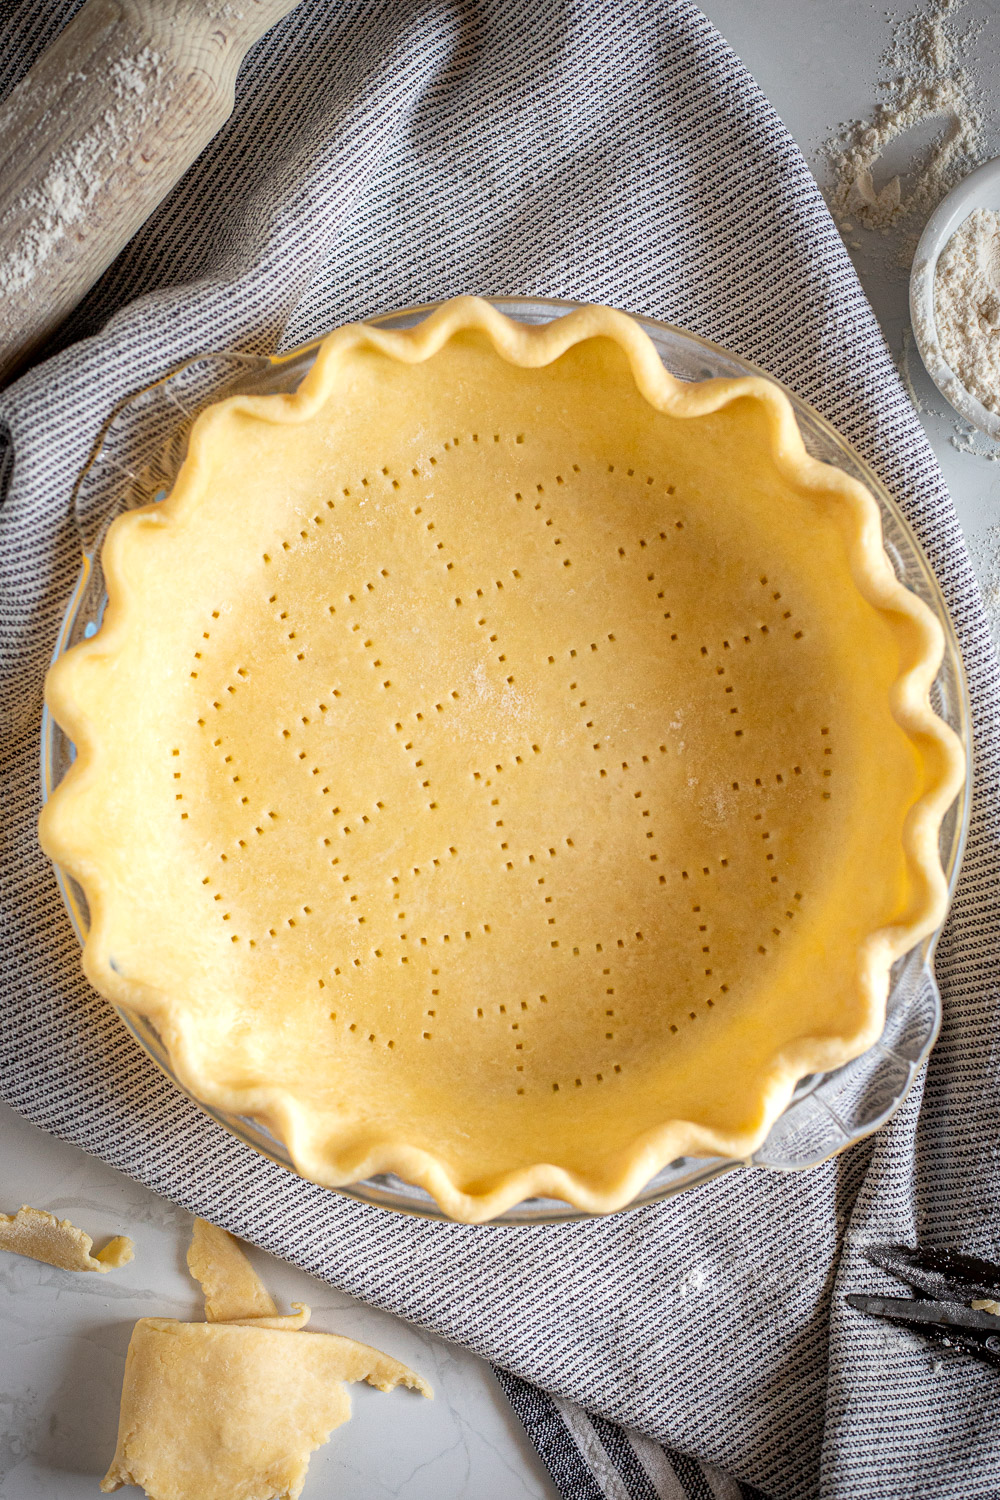
YIELD: This recipe makes enough for one 23 cm (9-inch) pie crust. To make a double crust pie, simply double the recipe and divide the dough into two discs before chilling.
Making pie crust can be a humbling experience. One minute your dough is sticking to everything; the next it’s disintegrating into a pile of crumbs. Then there are soggy bottoms, unsightly cracks, and crusts that shrink for no apparent reason — it’s enough to make even the most even-keeled baker start swearing under their breath!
That’s why every baker needs a reliable pie crust recipe in their back pocket. This is mine! It’s shatteringly flaky, full of buttery flavour (no shortening!) and far better than anything you’ll find at a grocery store. Best of all, you don’t need any special equipment to make it, just a bowl and your own two hands!
There’s no “secret ingredient” to my pie crust. In fact, you can find dozens of recipes online that use the same handful of ingredients. But what I can offer is the benefit of experience. In this guide, I’ll walk you through everything you need to know to start making delicious, beautiful pie crusts that turn out well every time.
Let’s get into it.

Why Make Pie Crust By Hand
Call me old-fashioned, but I like making my pie crusts by hand. Not only is it more satisfying, but it gives you a level of control that a food processor can’t replicate.
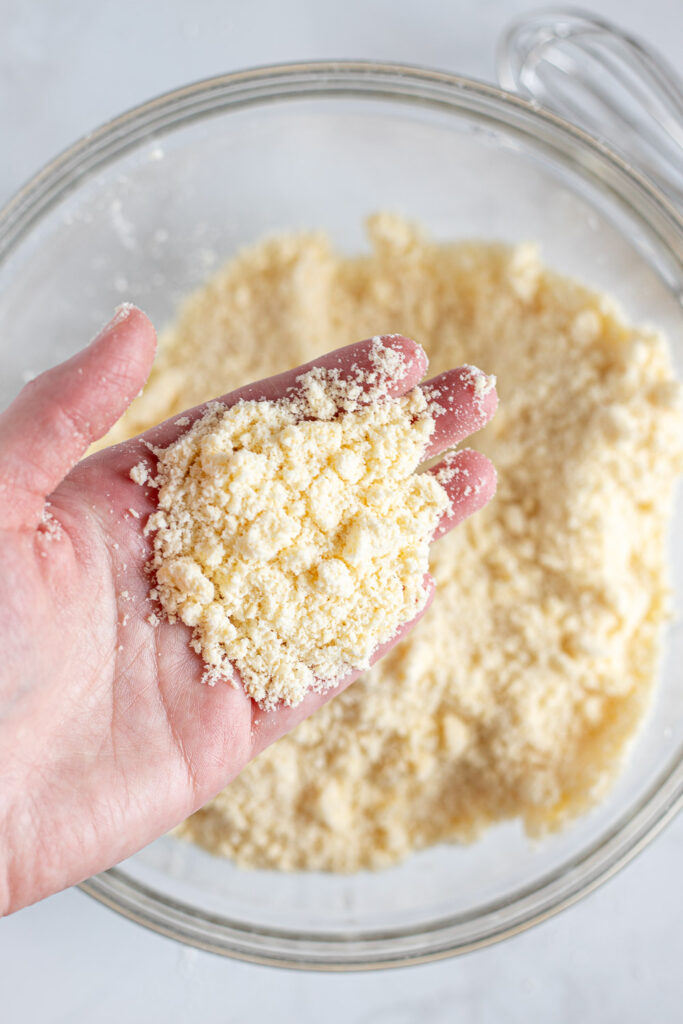
Working the butter in manually with your fingertips or a pastry cutter creates irregular-sized pieces of butter. This irregularity is what gives you a deliciously flaky pastry! When the larger pieces melt in the oven, they release steam and form delicate layers throughout the dough, whereas the smaller pieces coat the flour to create a more tender crust that melts in your mouth.
Food processors are much faster, but they can pulverise the butter into small, uniform pieces if you’re not careful, leaving you with a crust that’s more mealy than flaky.
Working by hand also makes it easier to control the hydration of the dough, since you can physically feel when it’s just moistened enough to hold together. With a food processor, it’s incredibly easy to add too much water or over-process the dough. Both of these mistakes encourage gluten development, which can make the crust tough and gummy rather than light and flaky.
Plus, at the end of the day, any time saved using a food processor is usually wasted having to clean the thing!
When to reach for a food processor
Okay, so food processors aren’t all bad. They can be a lifesaver when working in hot kitchens where the butter melts quickly. If you do use one, the key is to use short pulses, stopping frequently to check and feel the texture of the dough. If you can’t see any distinct, visible pieces of butter, you’ve gone too far.

The Golden Rule: Keep Everything Cold
A good pie crust depends on keeping your butter cold and intact until it hits the oven. If the fat melts while you’re working the dough, you’ll trade your flaky layers for a sticky, greasy mess.
Keeping the temperature down starts with prepping your ingredients:
- Freeze the butter: Cut your butter into cubes and pop them in the freezer 10-15 minutes before you begin. Don’t let them freeze solid (or you won’t be able to work them into the flour), but they should be very cold.
- Ice your water: If you don’t have ice cubes on hand, fill a measuring cup with water and place this in the freezer too. If it freezes over, tap the surface with a spoon to break up the ice.
- Chill your tools: While you wait, you can even prep the dry ingredients and place this bowl in the fridge along with your pastry cutter (if using).
As for your hands? No, don’t put them in the freezer! But you’ll want to work quickly and aim to handle the dough as little as possible. Warm hands are one of the fastest ways to melt butter.

What You’ll Need and Why
You only need a few simple ingredients to make pie crust from scratch.
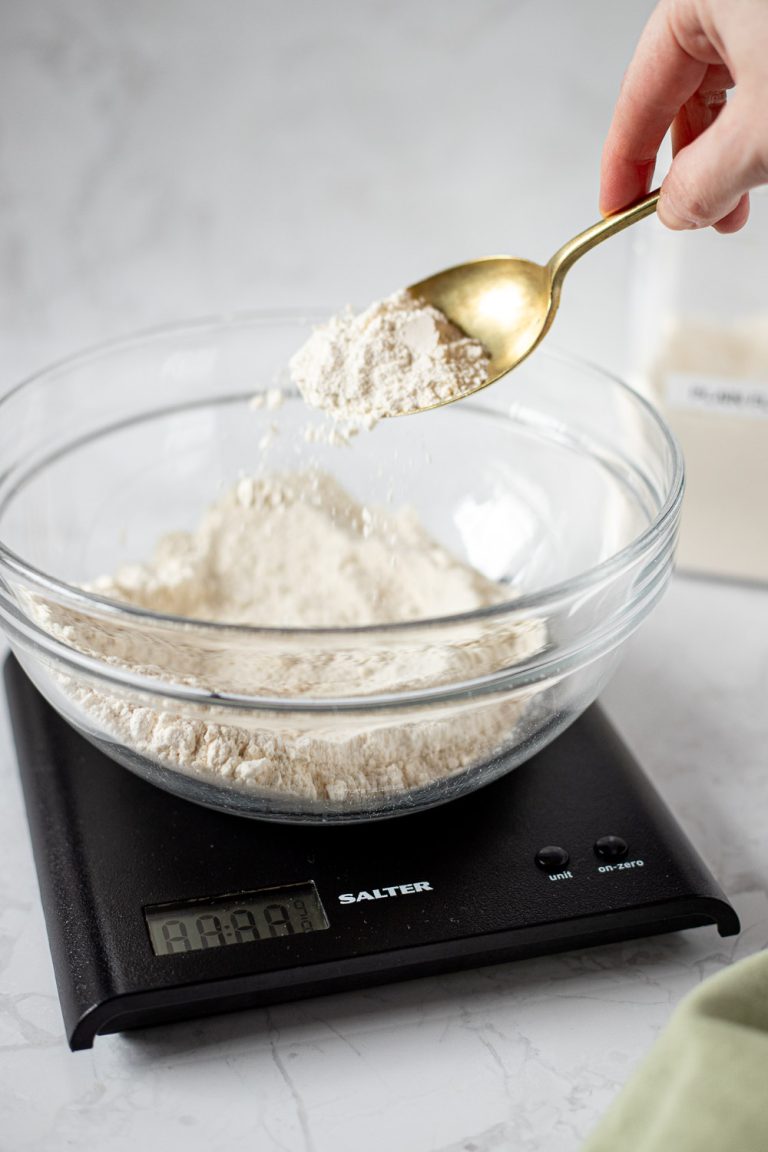
- Plain Flour: Also known as all-purpose flour in the US. Plain flour is ideal for pie crust due to its moderate protein content, which keeps the pastry tender. Higher protein flours, like bread flour, develop too much gluten and can make the crust tough and chewy.
- Cold Butter: I personally don’t use shortening in my baking. It’s flavourless, highly processed, and rather unappetising to look at. This crust is made with 100% butter, and it’s still plenty flaky without it. Use a high-quality butter like Lurpak or Westgold (NZ butter), and cut it into roughly 1–1.5 cm (1/2-inch) cubes. Salted or unsalted is fine, just adjust the added salt accordingly.
- Salt: For flavour!
- Sugar (optional): Adds a subtle sweetness to complement sweet fillings.
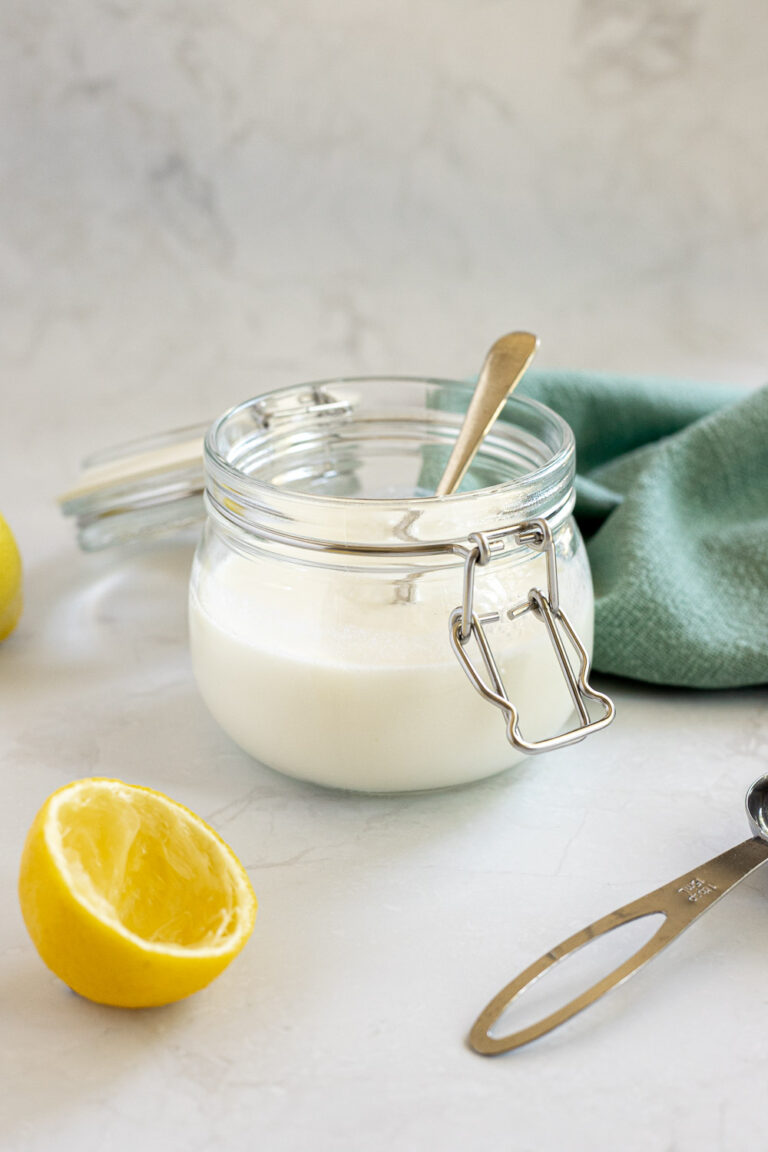
- Apple cider vinegar: The acidity in vinegar slows gluten formation producing a crust that’s more tender and easier to work with. You can substitute any white vinegar.
- Ice water: Just enough to hold it all together. The amount you’ll need will vary day-to-day depending on factors like humidity and the brand of flour you’re using. I find I need more water in the winter months.
Making the Dough (4 Easy Steps)
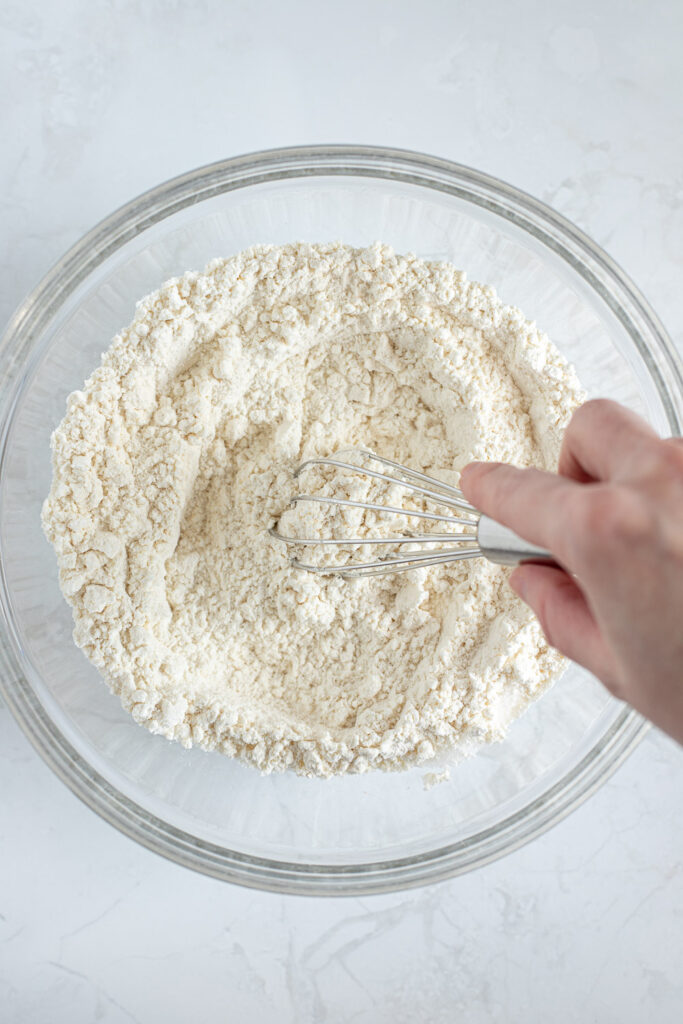
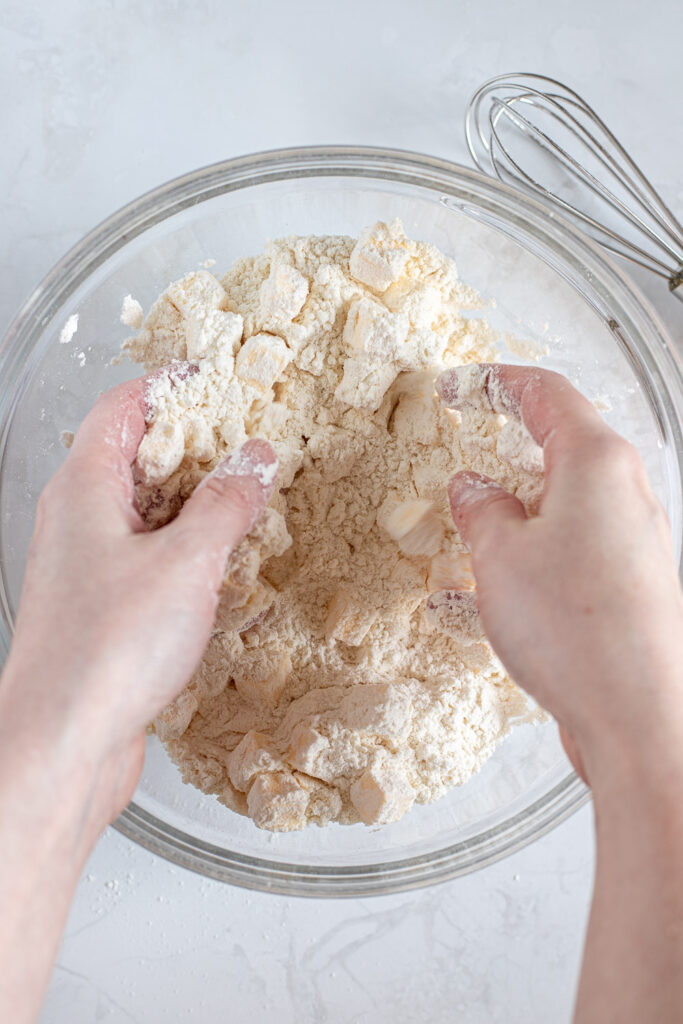
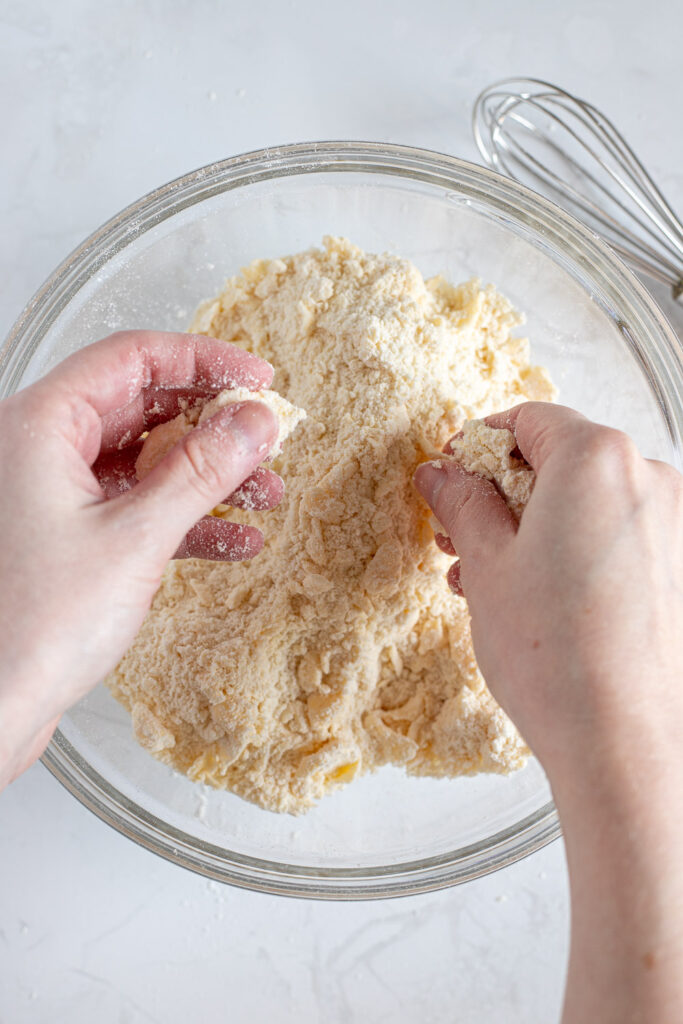
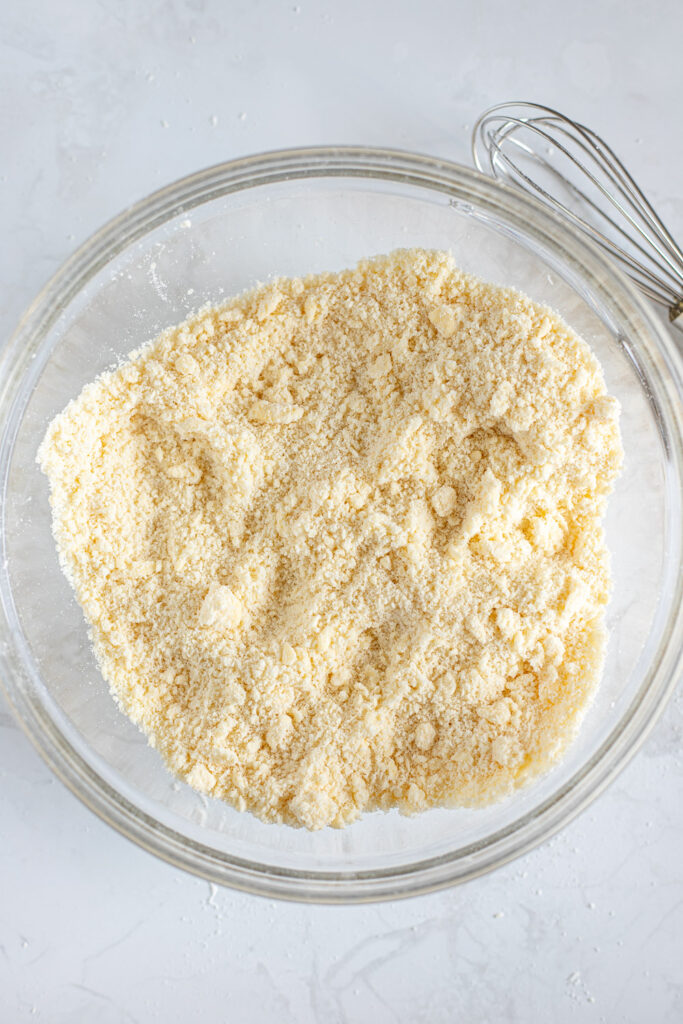
1. Work the butter into the flour – In a mixing bowl, whisk together the flour, sugar, and salt. Add the cold, cubed butter and toss to coat it in the flour. Use a pastry cutter to cut the butter into the flour OR rub the butter pieces between your thumb and fingertips to break them into smaller bits. Continue until you have a mixture of larger pea-sized pieces and finer crumbs. If the butter gets too warm at any point, place the bowl in the fridge for a few minutes before continuing.

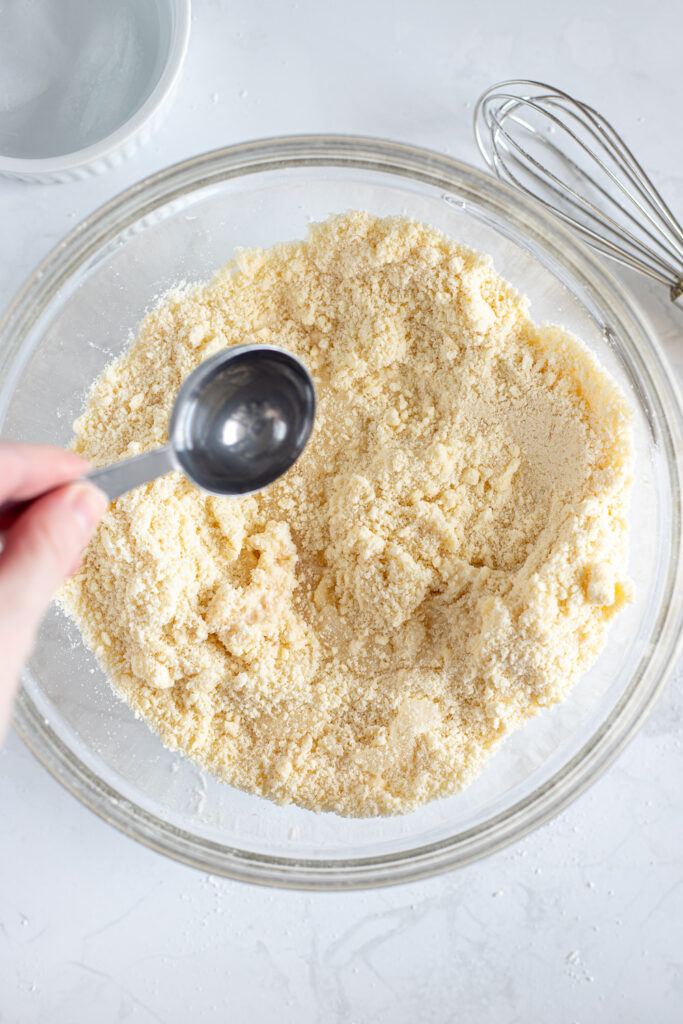
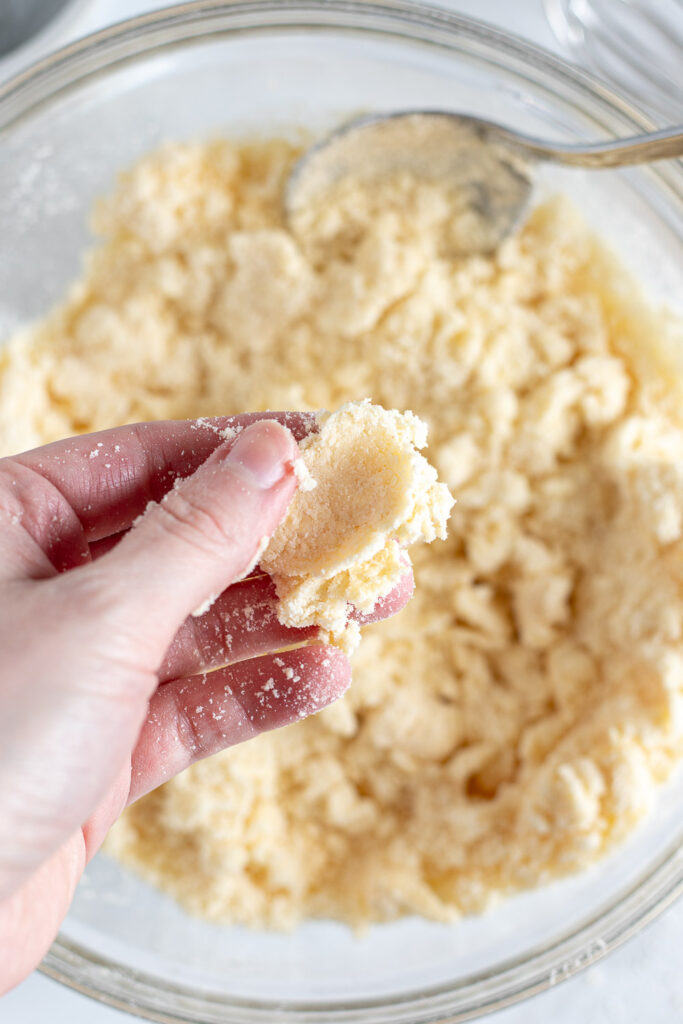
2. Hydrate the dough – Add the vinegar, then sprinkle in 1 tbsp of ice water at a time. Mix with your hands or a spoon and continue adding water JUST until the dough holds together. To test it, grab a piece and squish it between your fingers. If it crumbles back into the bowl, it needs more water. If it holds together (even if it still looks slightly dry), you’ve added enough.
Note: It’s better to under-hydrate than to over-hydrate, as you can add more water in the next step if need be.
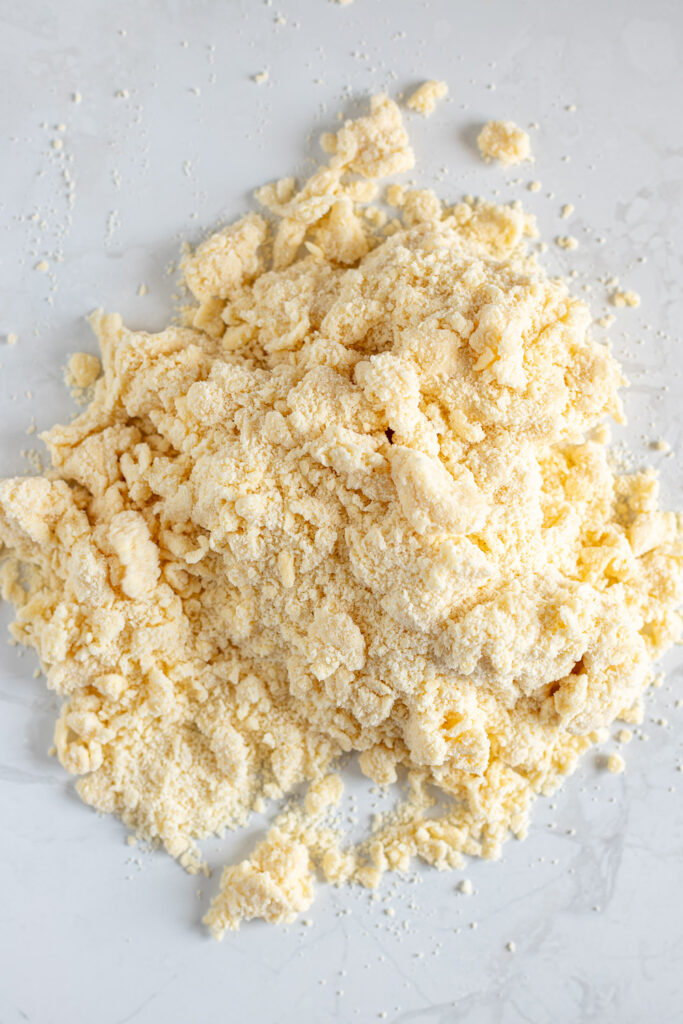
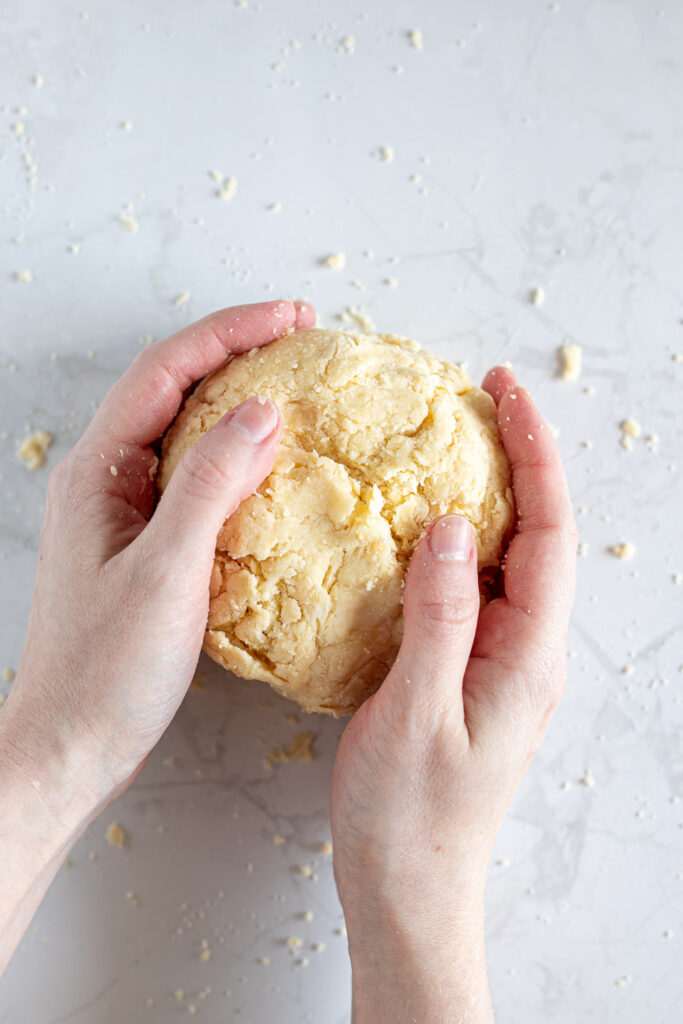
3. Bring it together – Tip the contents of the bowl (crumbs and all) onto a lightly floured work surface. Bring it together with your hands, pressing and folding just enough to form a rough dough. If there are still loose crumbs, sprinkle with a touch more water to help it stick together.
4. Chill – Flatten the rough dough ball into a disc and wrap tightly in clingfilm. Chill in the refrigerator for a minimum of 1 hour (I recommend 3 hours for easier handling), or up to 3 days.

Rolling, Shaping, and Crimping
It’s always best to follow the instructions in your recipe for preparing the crust, as different fillings will require different methods. The steps below are intended as a general guide only for making a single pie crust in a pie dish.
1. Roll out the dough – If your dough is quite firm after chilling, let it sit on the countertop for about 10 minutes to soften slightly. Lightly flour a work surface and begin rolling the dough out from the centre. After every few rolls, stop and rotate the dough 90 degrees (a quarter turn) and add more flour underneath if it’s starting to stick. Continue rolling until you have a circle that’s a few inches wider than your pie dish. If the dough has gotten soft, transfer it to a plate or baking tray and chill for 10 minutes.
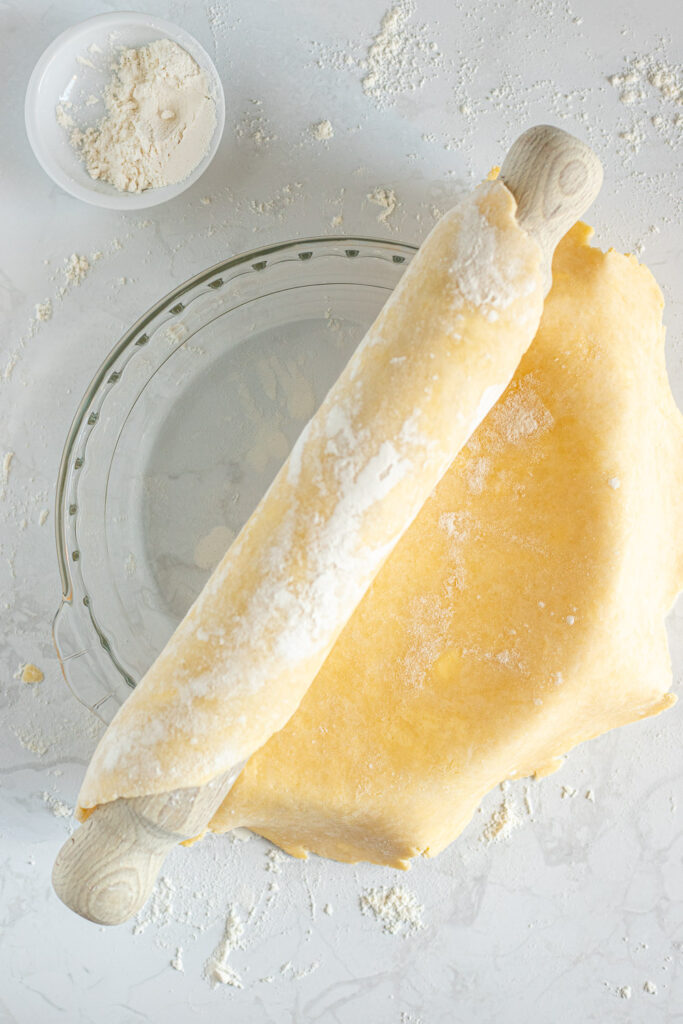
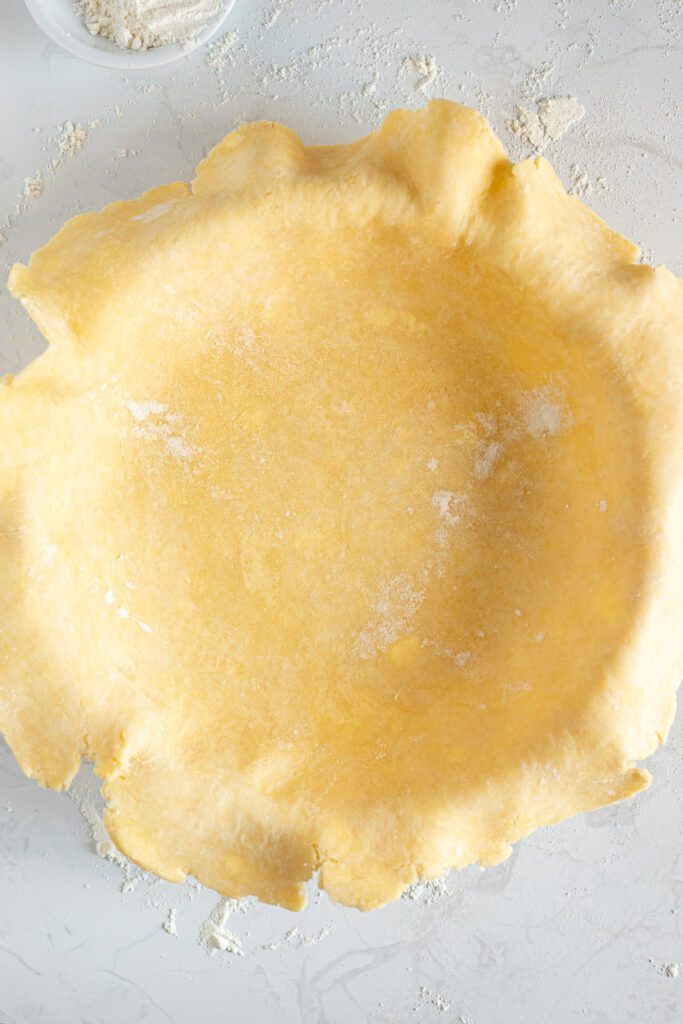
2. Transfer to a dish – You can either fold the dough into quarters or loosely roll it around a floured rolling pin. Then position the dough over your pie dish and carefully unfurl it. Without stretching the dough (this causes shrinking), gently press it into the corners and sides of the dish.
Note for double crusts: If making a double crust pie, leave the edges for now. You’ll trim and crimp them once you’ve added the filling and top crust.
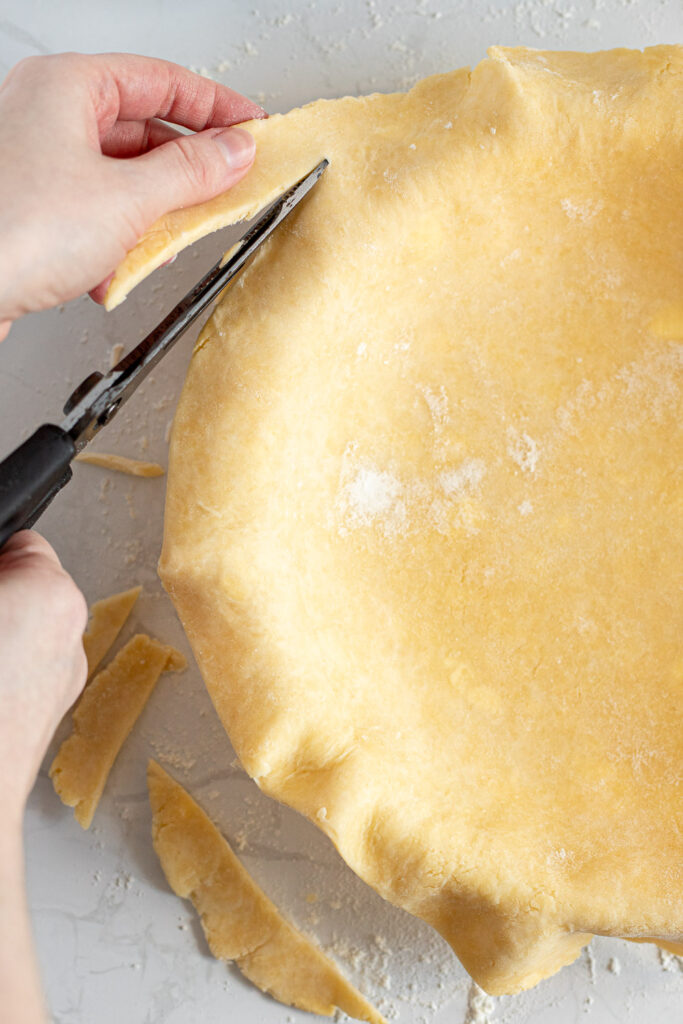
3. Trim the edges – Use scissors to trim the edges, leaving about 2-3 cm of overhang. You can use the scraps to patch up any cracks and gaps in your crust. Tuck the edge under itself and press to seal (this forms a smooth, sturdy edge that holds its shape better).
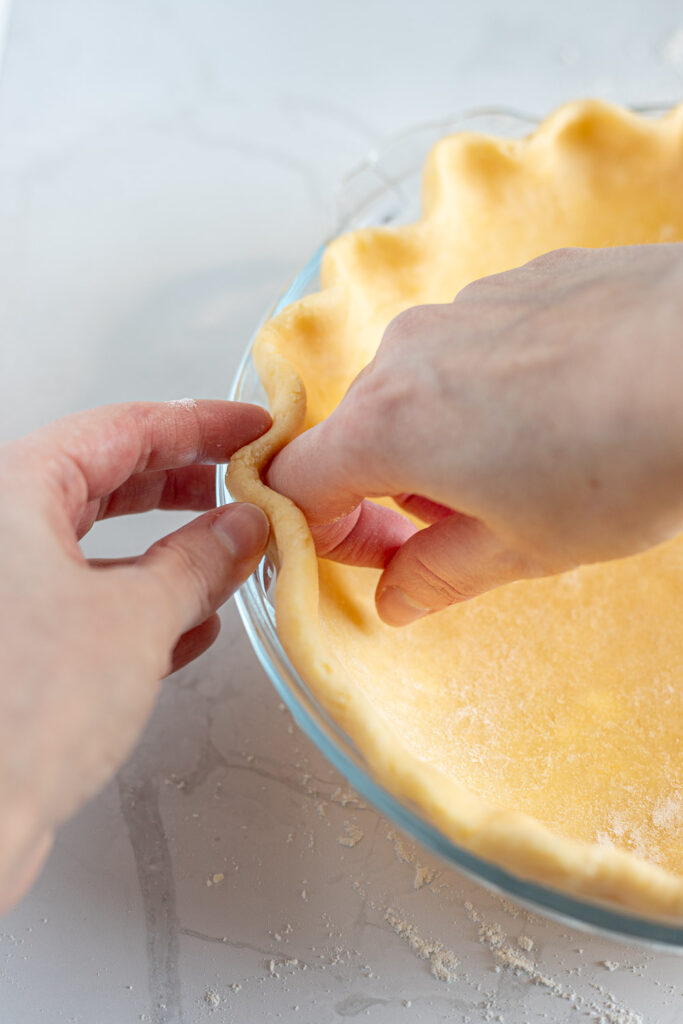
4. Crimp – There are many ways to crimp a pie crust! I like to crimp with the tines of a fork, or make a simple fluted edge with my fingers (as pictured).
5. Chill again – To prevent shrinkage and help the crust hold its shape, chill it again for at least 20-30 minutes before baking.

When to Blind Bake (and How)
Blind baking is the process of partially or fully cooking your pie crust before adding the filling. It helps prevent a soggy bottom when working with wet fillings, giving the pastry a chance to crisp up.
Take your classic quiche as an example. The delicate egg custard needs to cook slowly at a lower temperature than what’s required to achieve a deeply golden brown crust. If you poured the filling into an unbaked crust, it would likely come out pale, doughy, and undercooked!
As a general rule:
- Par-bake your crust (bake until lightly golden and set) for custard-based or particularly wet fillings, like pumpkin pie or quiche.
- Fully bake your crust (bake until deep golden brown) for fillings that require no baking at all, like chocolate cream pie or fresh fruit tarts.
- There’s no need to blind bake most double crust pies (including apple and berry pies) unless your recipe specifically tells you to.
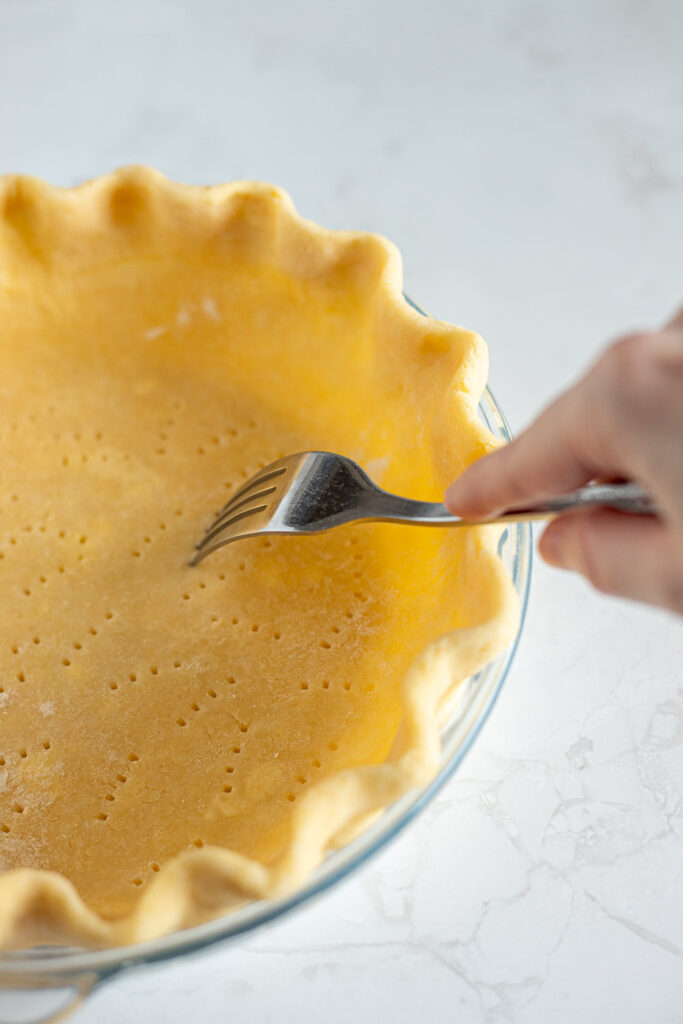
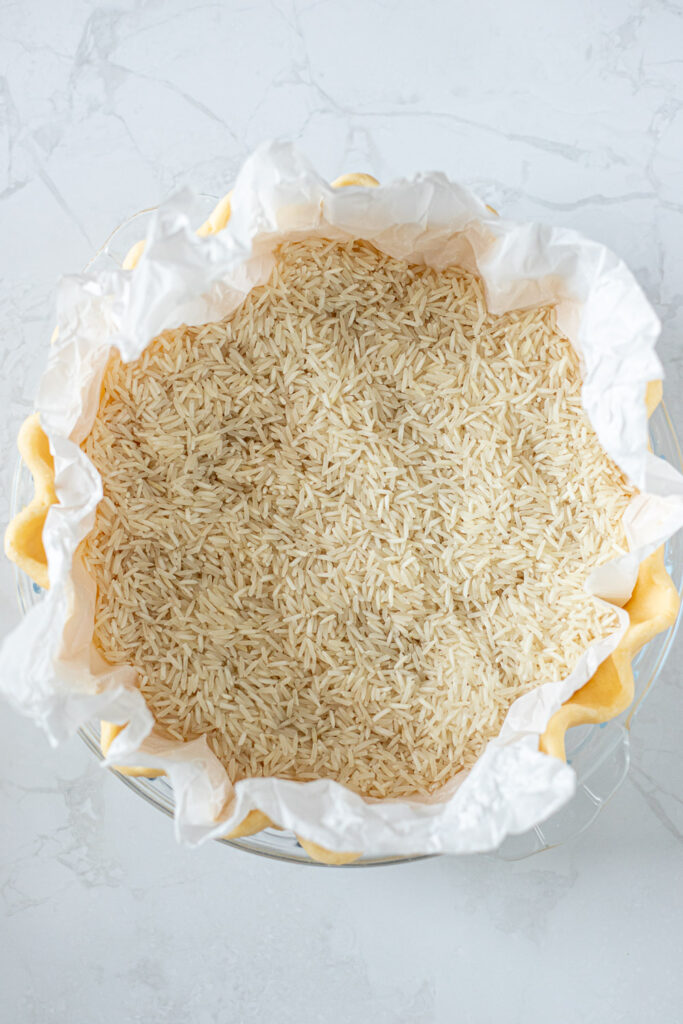
How to blind bake a pie crust
- Dock the base – Use a fork to poke holes all over the base of your crust. This gives steam a place to escape, helping the pastry to stay flat against the pie dish rather than puffing up.
- Weigh it down – Line the crust with parchment paper (scrunch it up first to make it more pliable), then fill it with pie weights, dried rice, or dried beans. Spread the weights around so they’re evenly distributed around the base and up against the sides.
- Bake until lightly golden – Bake in a 200°C (180°C fan/400°F) oven until the edges are set and lightly golden. Carefully remove the weights and paper.
- Return to the oven – Return the pie dish to the oven. For a par-baked crust, continue baking until the base is set and no longer looks pale. For a fully-baked crust, continue baking until the entire crust is a deep golden brown colour. If the crust starts to puff up, open the oven and prick with a fork to deflate. Allow to cool before filling.
Quick Tips for Perfect Pie Crust
- Keep it cold: From your ingredients, to your tools, to your finished dough — everything should stay cold. If it starts to soften or feel warm at any point, back in the fridge it goes!
- Add water little by little: You only need just enough for the dough to hold together. Remember, you can always add more, but you can’t take it out.
- Don’t overwork it: Handle the dough as little as possible to avoid softening the butter or developing too much gluten (which leads to a tough crust). Avoid kneading, and try not to re-roll more than once.
- Don’t force it: Gently drape and ease the dough into the pie dish rather than stretching it to fit (stretching causes shrinkage). If there are gaps or cracks, patch them with leftover dough scraps after trimming.
- Use a glass pie dish (if you can): Glass helps prevent over-browning and makes it easier to see when the crust is baked underneath. Metal tins are fine for tarts or anything where you want a crisper base.
- Chill again before baking: Always chill the shaped crust for at least 20 minutes before baking. This limits shrinkage and helps it hold its shape, so you don’t lose those pretty, crimped edges!
- Blind bake if you need to: If a recipe tells you to blind bake the crust, don’t skip it — especially for liquid fillings. You wouldn’t want a soggy bottom, would you?
How to Freeze Pie Crust
Pie dough can be frozen for up to 3 months, so you can make a big batch and always have some on hand. To freeze, wrap each disc tightly in cling film, then place inside a freezer bag. Defrost overnight in the refrigerator before using.
Flaky All-Butter Pie Crust (Shortcrust Pastry)
* Please note: all cup measurements are approximate and based on Australian standard cups (250ml). For best results, weigh your ingredients with a kitchen scale.
Equipment
- pastry cutter, optional
- rolling pin
- scissors, for trimming edges
- 23 cm (9-inch) pie dish, glass recommended
- pie weights/dried rice or beans, for blind baking
Ingredients
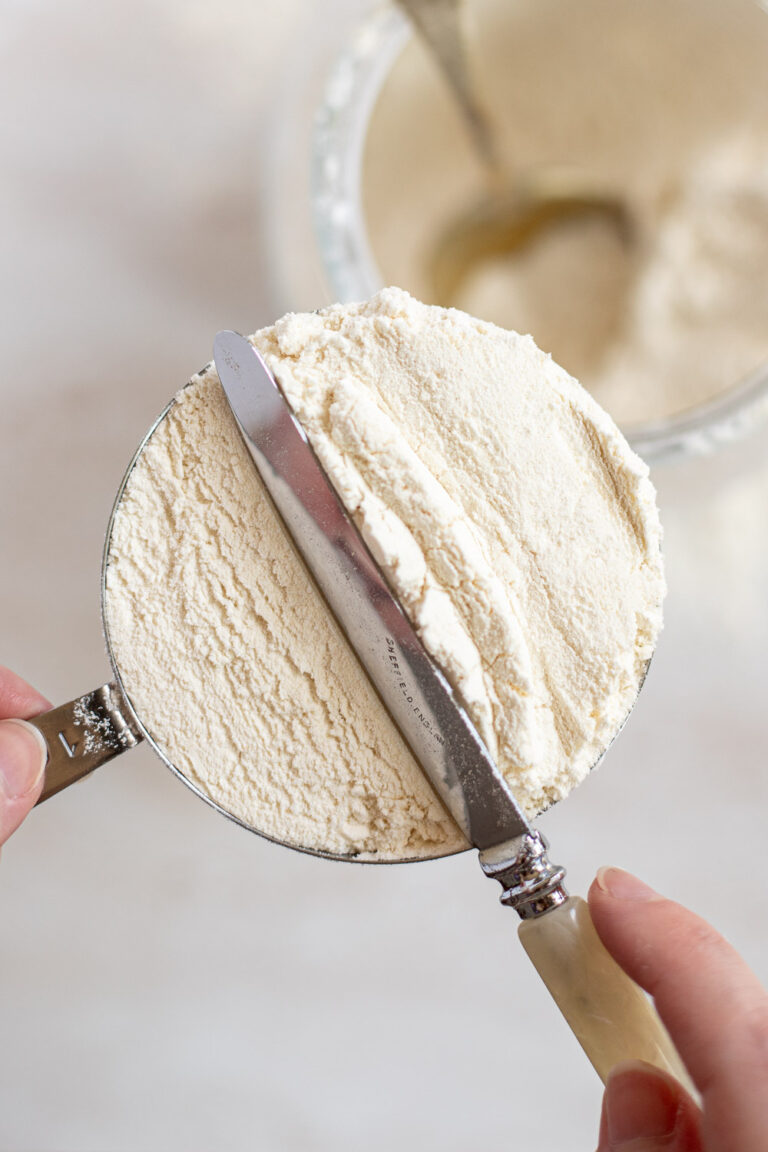
- 160 g (1 ¼ cups, spooned and levelled) plain flour
- 110 g (about ½ cup) cold butter, cut into 1-1.5 cm (1/2-inch) cubes
- ½ tsp salt, reduce to ¼ tsp if using salted butter
- 1 tbsp granulated sugar, for sweet pies and tarts (optional)
- 1 tsp apple cider vinegar, or white vinegar (see notes)
- 45-75 ml (3-5 tbsp) ice water
Instructions
- Keep everything cold: before you begin, place your cubed butter in the freezer for 10-15 minutes. If working in a warm kitchen, place your bowl and tools in the fridge as well. If the dough starts to feel warm or sticky at any point during the process, return to the fridge to firm up before continuing.
Making the dough
- In a large mixing bowl, combine the flour, sugar, and salt. Add the cold butter and toss to coat in the flour. Using a pastry cutter, a fork, or your fingers (this is what I do), work the butter into the flour until the mixture resembles coarse crumbs, with some pea-sized pieces of butter remaining.
- Add the vinegar, then the ice water 1 tbsp at a time until the dough comes together. If the crumbs stick together when you squeeze them between your fingers, then you've added enough water. Be careful not to add too much water or the dough will be sticky and difficult to work with.
- Transfer the dough onto a lightly-floured work surface and bring it together with your hands to form a rough ball. It won't be smooth — DO NOT knead the dough.
- Flatten the dough into a disc and wrap tightly in cling film. Refrigerate the for at least 1 hour or up to 3 days.
Rolling, sealing, and crimping
- Follow the instructions in your chosen recipe if specified, or use the steps below for a standard pie crust.
- Lightly flour your work surface and rolling pin. Unwrap the dough and begin rolling from the centre outward. Every few rolls, rotate the dough a quarter turn to prevent sticking, adding more flour underneath as needed. Continue rolling until you have a circle that's roughly 30 cm (12 inches) in diameter.
- Gently fold the dough into quarters or loosely wrap it around your floured rolling pin, then unroll it onto your pie dish. Carefully re-centre if needed and press the dough down so it sits snug against the base and sides, being careful not to stretch it (this causes shrinking).
- For single crusts: use a knife or scissors to trim the excess dough, leaving about 2-3 cm (1 inch) of overhang. Fold the edge underneath itself and press to seal, then crimp or flute as desired.For double crusts: add your filling then top with the second crust or lattice. Trim excess dough so both layers are even, then fold the edges inwards together, and press to seal before crimping.
- Chill the shaped pie crust for 20-30 minutes before baking.
Blind baking (if required)
- Liberally prick the base of the chilled pie crust with a fork.
- Scrunch a large sheet of parchment paper, then smooth it out and place inside the pie crust. Fill with pie weights and spread them out evenly, making sure they support the sides.
- Bake in a 200°C (180°C fan/400°F) preheated oven until the edges are lightly golden and look set. Remove from the oven and lift out the paper and pie weights by gathering the corners of the parchment. Let the pie weights cool completely before storing away for re-use.
- Return the empty pie crust to the oven and continue baking. If you'll be baking the pie again after filling, remove once the base is set and just starting to turn golden. For a fully-baked pie crust, remove once deep golden brown all over. If any air bubbles form while baking, prick them with a fork to deflate. Set the crust aside to cool before filling.